RV Inverter and Battery Upgrade
We recently upgraded the electrical system in our RV to make it more reliable for off-grid use. We are amateur radio oeprators, and I’m a general tinkerer, and this project was about getting a setup that works for my needs - mostly camping, some radio oepration, and frequent stays at unpowered campsites in provincial or national parks. Here’s what I installed, how I wiered it, and a few things I figured out along the way.
🔧 Parts List
Here’s the hardware I used:
- Inverter: Renogy RIV1210PU-126-CA – 12V 1000W Pure Sine Wave Inverter with UPS Transfer Switch and Built-in Bluetooth
- Battery: Renogy RBT12100LFP-M-CA – Core Mini - 12.8V 100Ah Lithium Iron Phosphate Battery (planning to add a second)
- Battery Monitor: Renogy RBM500-CA – 5500A Battery Monitor with Shunt
- Busbars: 12V 250A Power Distribution Block (Amazon)
- Circuit Breakers: Red Wolf 100A & 80A Breakers (Amazon)
- Wire: 6AWG and 4AWG marine-grade wire from Binnacle
- Solar: Renogy RPP100EF-SE-CA E.FLEX-CORE 100W Portable Solar Panel + Renogy RNG-CTRL-WND10-BT-CA Wanderer 10A PWM Charge Controller
🛠️ Installation Overview

1. Relocating Power to the Storage Compartment
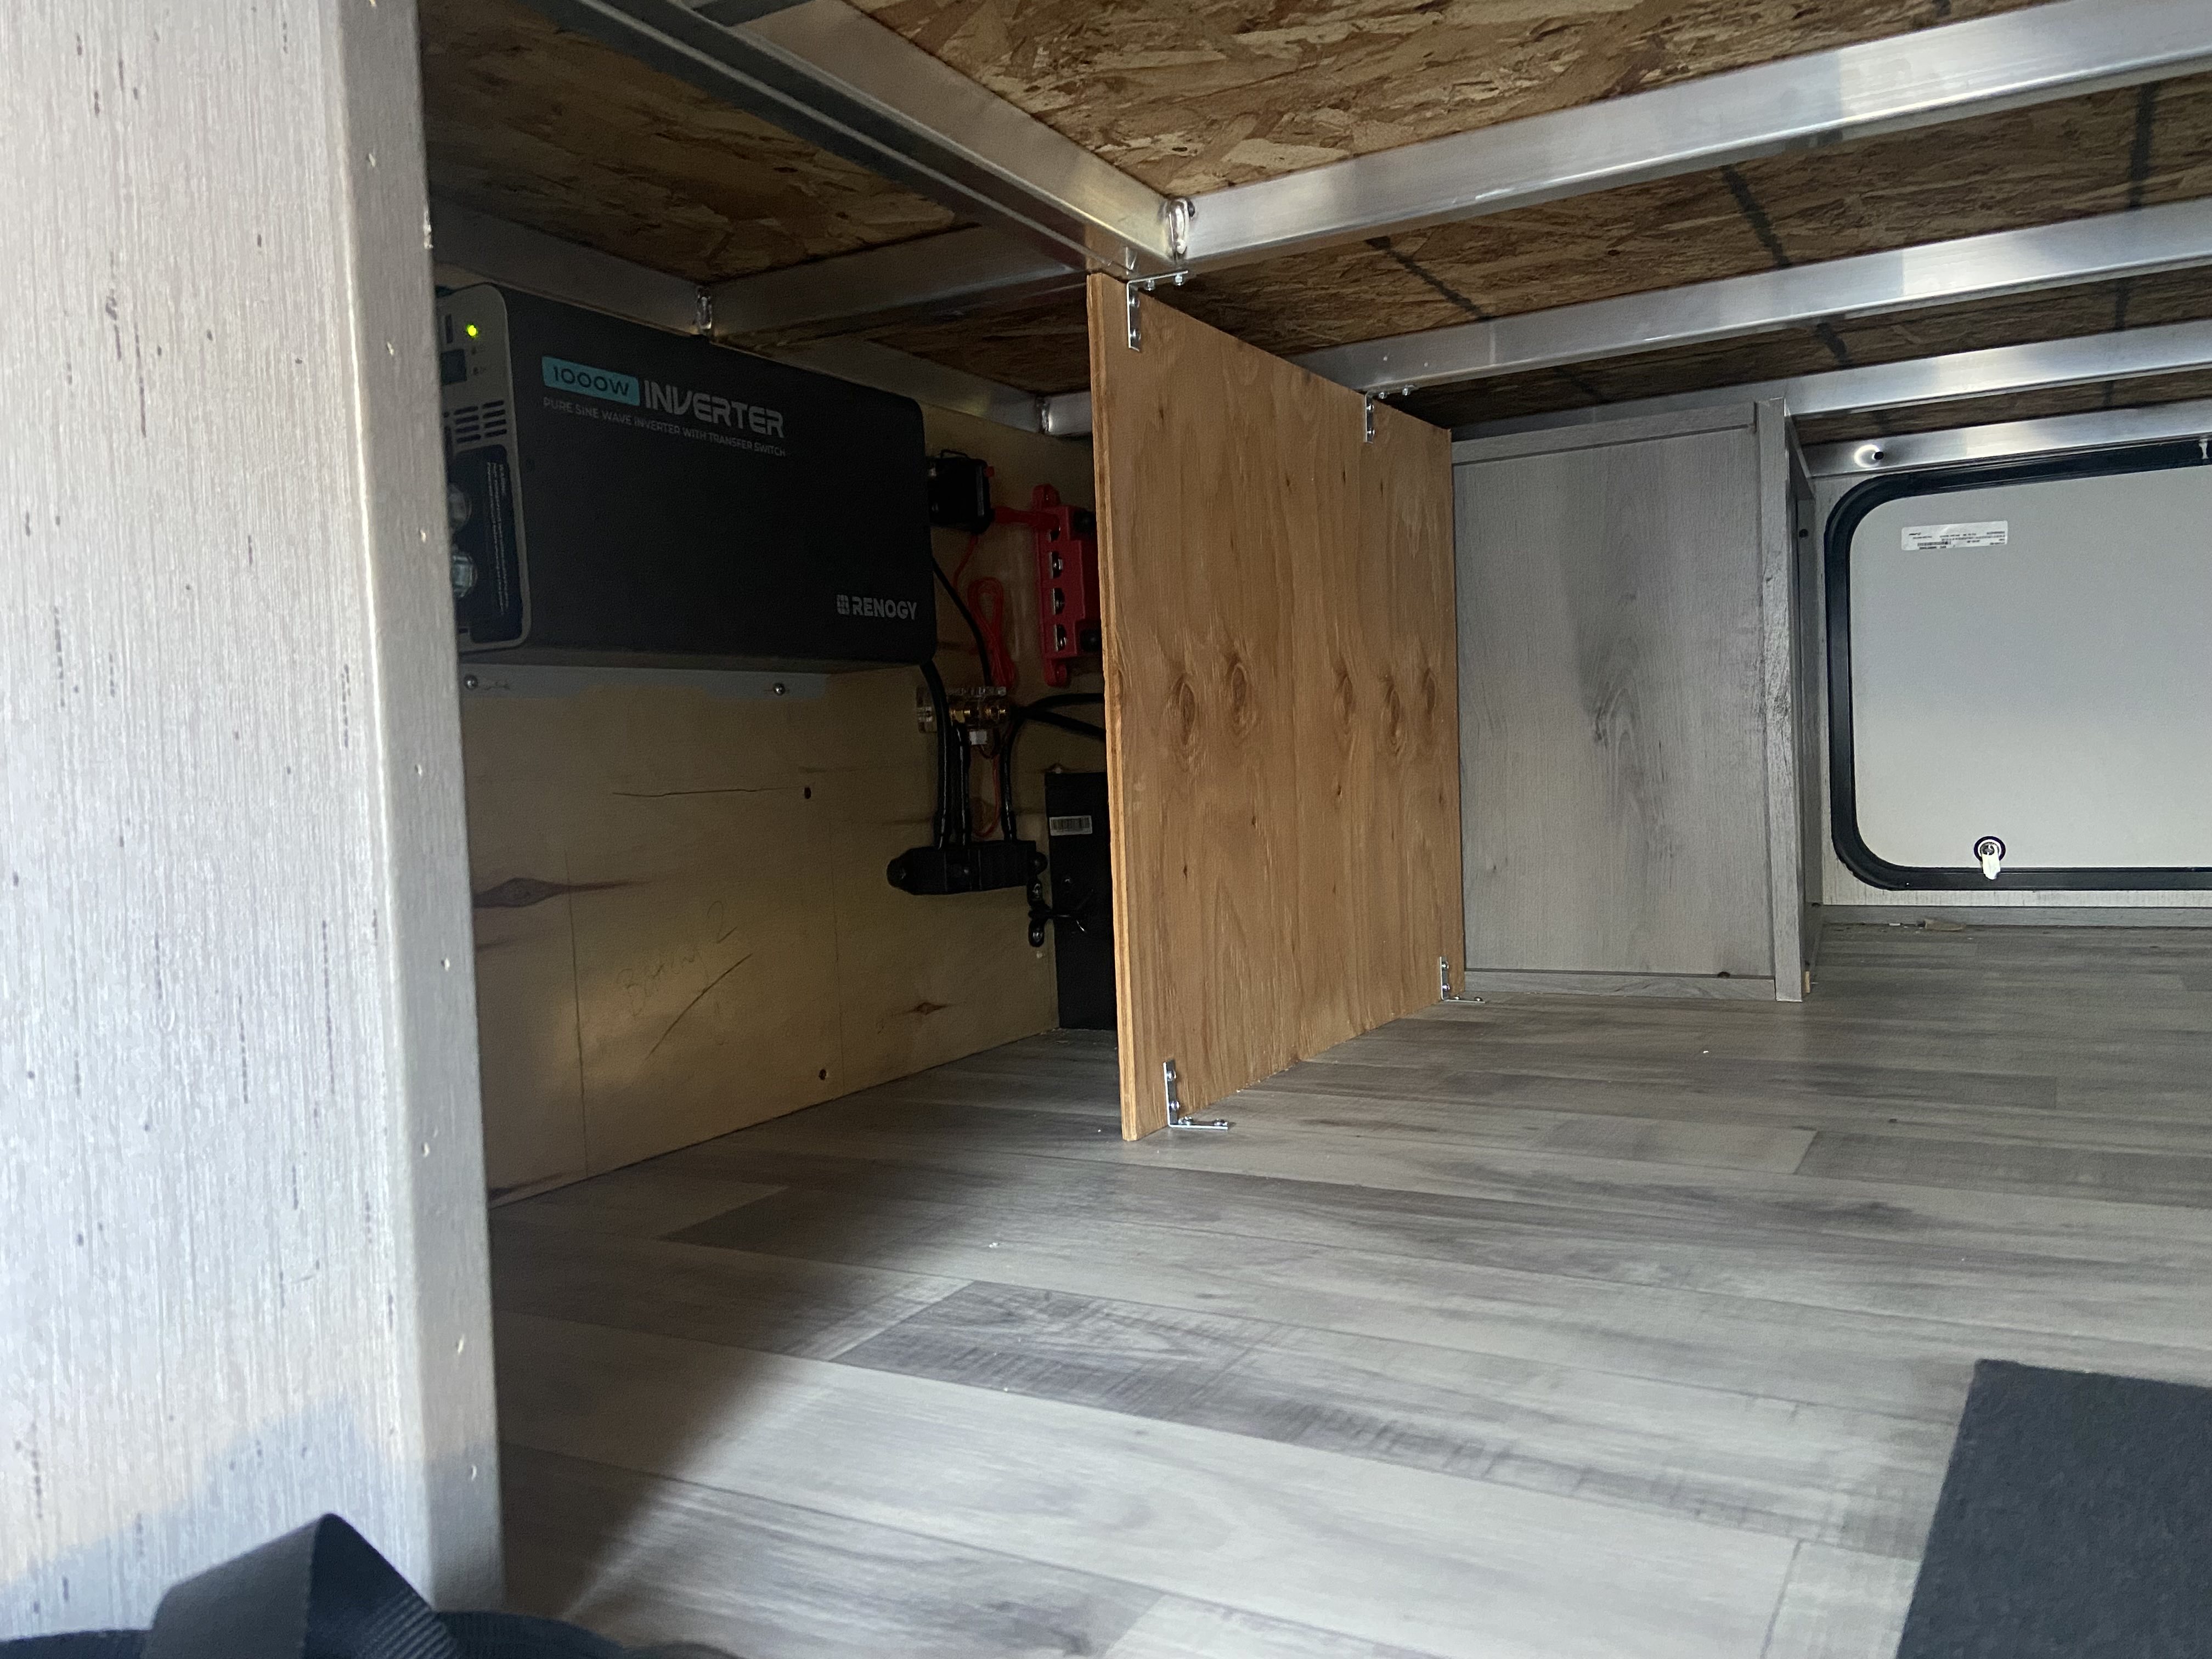
The trailer’s original battery was mounted on the front A-frame. As part of this project, we relocated the battery into the passthrough compartment below the bed, inside the heated area of the trailer. This change improves cold weather reliability since lithium batteries don’t charge well below freezing. Lithium is also safe to install inside because it doesn’t produce fumes, which is a bonus from both a safety and theft-prevention standpoint.
With the battery removed, the A-frame can now be repurposed to house a storage box for wheel chocks and accessories needed during setup and connection to the truck.
To maintain 12V supply to the trailer’s original wiring, we ran 6AWG wire from the new battery location to the original battery location. An 80A breaker protects this run, which continues to feed the trailer’s factory 12V system.
To maintain 12V supply to the trailer’s original wiring, we ran 6AWG wire from the new battery location to the original battery location. An 80A breaker protects this run, which supplies our trailer’s original 12V system.
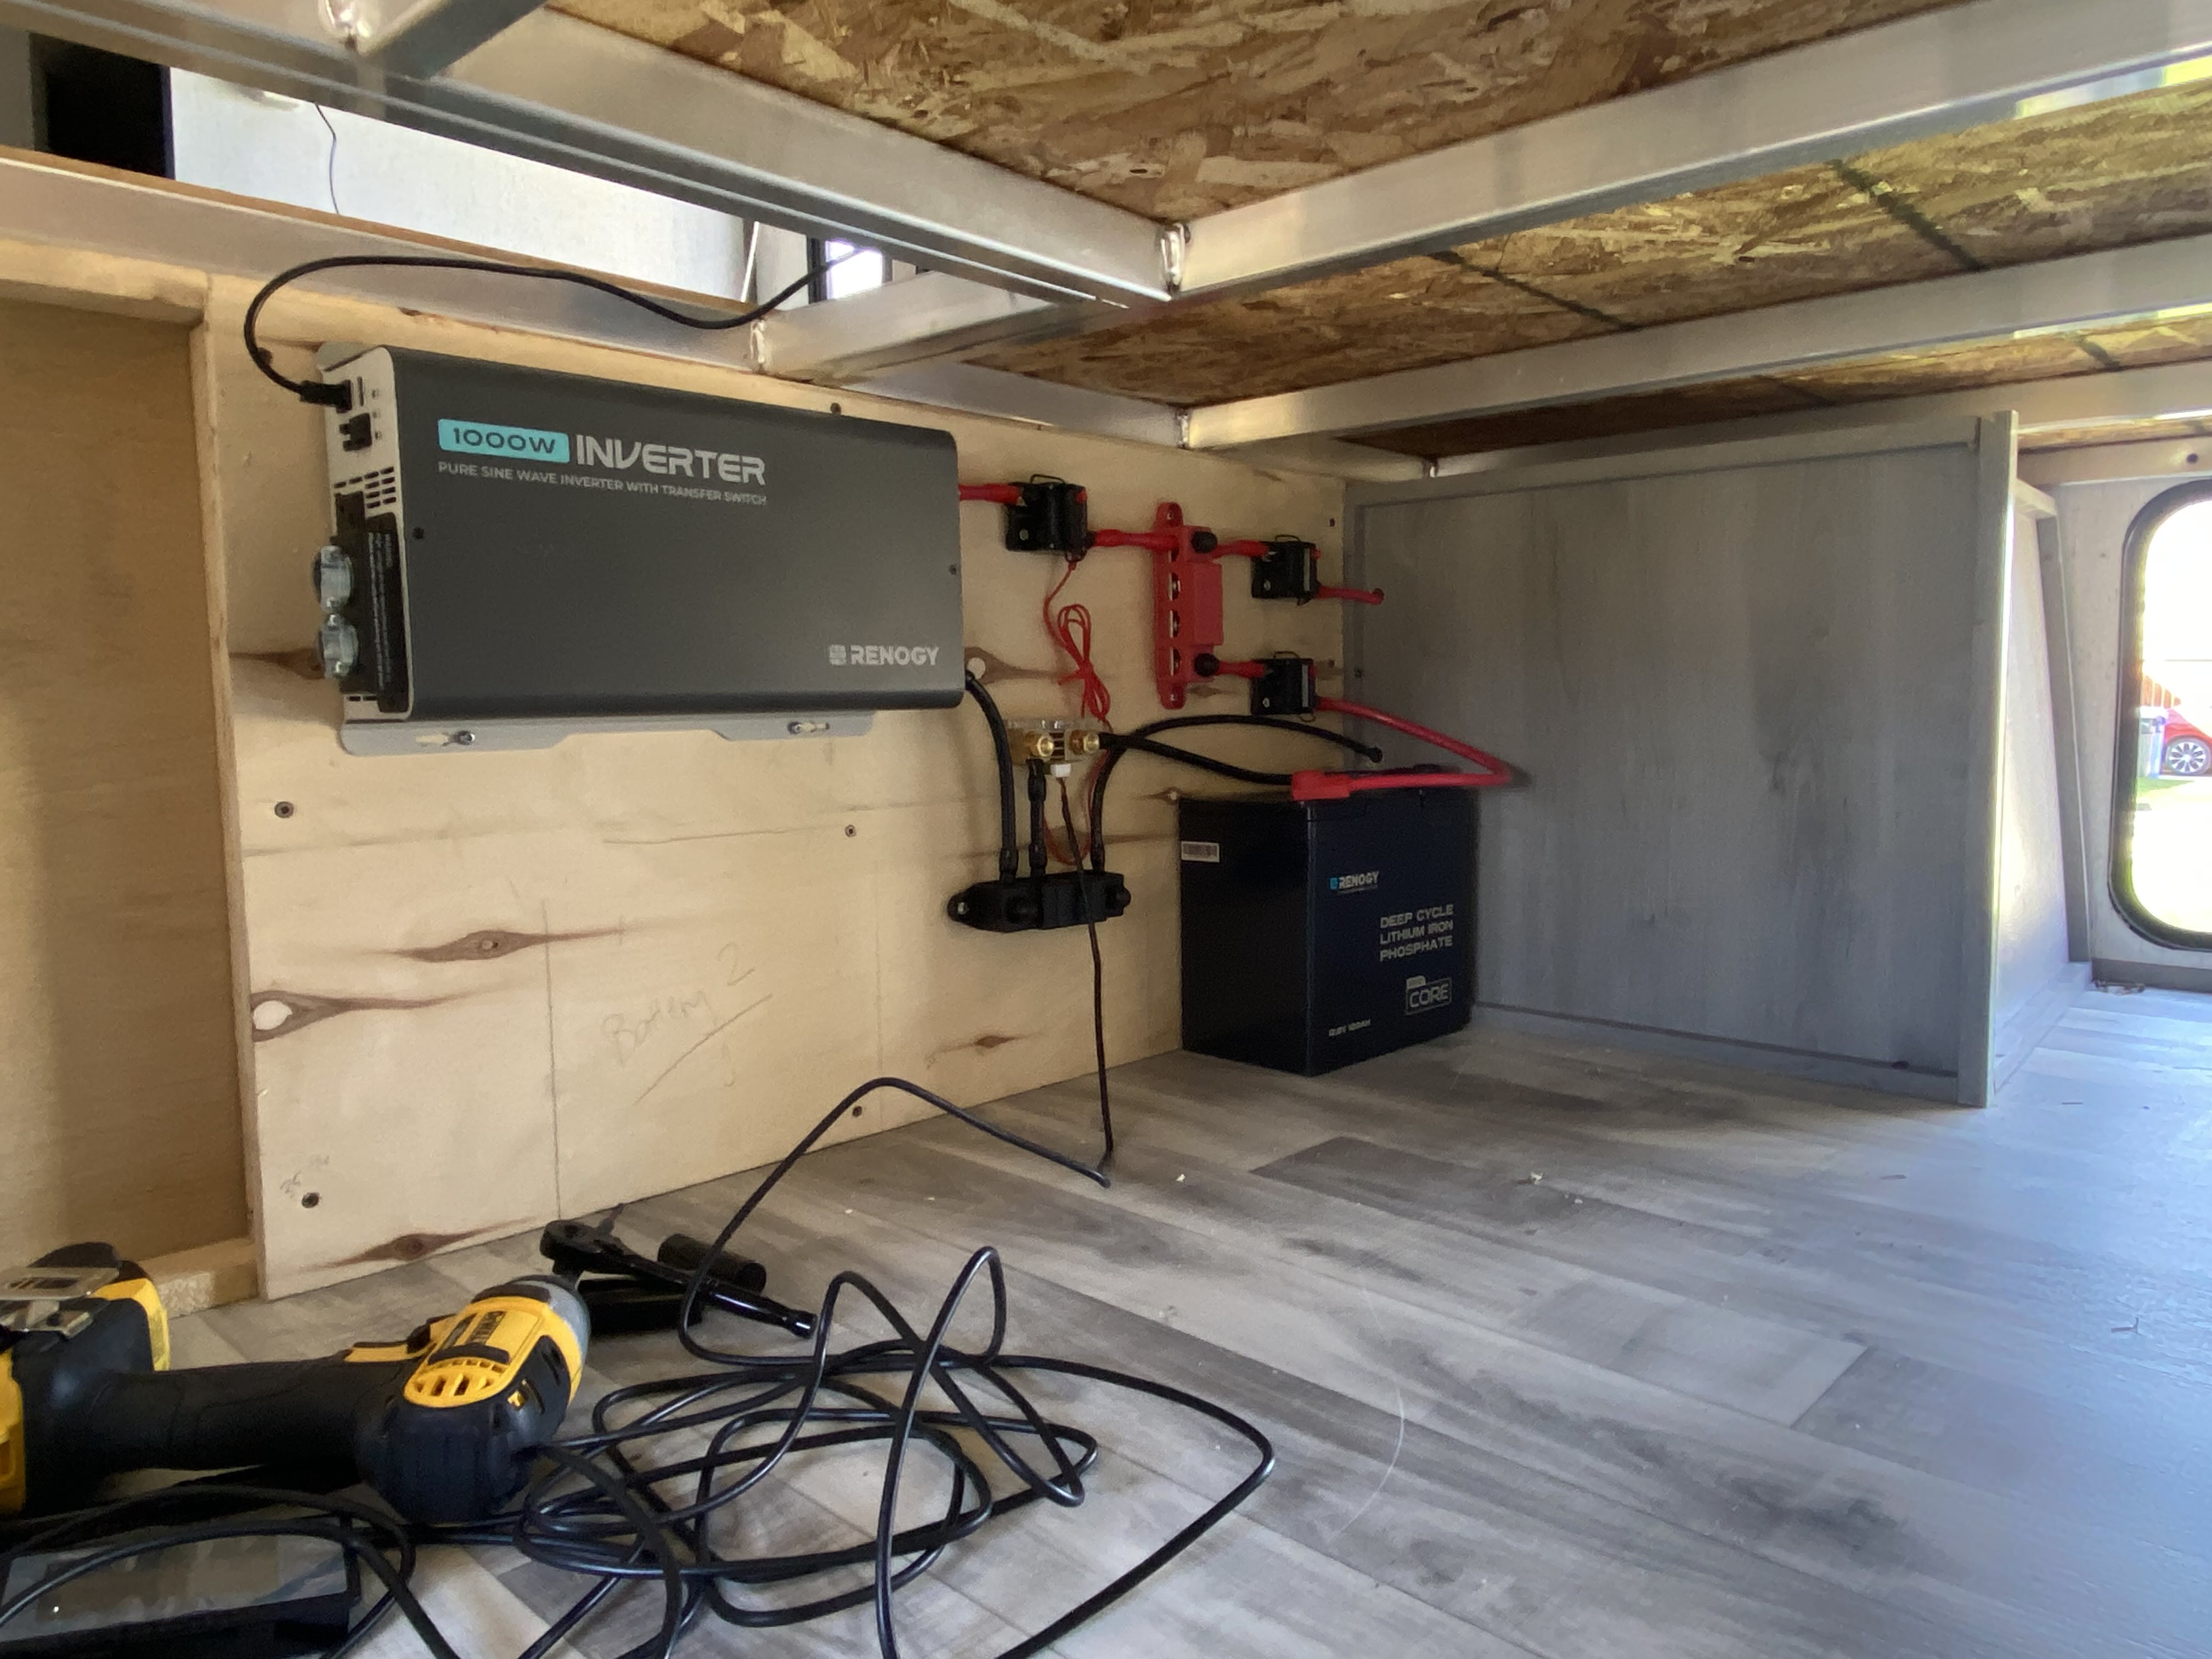
2. Mounting the Components
We mounted everything to a piece of ½” plywood for easy layout and access. This includes the busbars, breakers, battery, shunt, and inverter. The 100Ah Renogy battery connects here, with a 500A shunt installed between the battery’s negative and the negative busbar. Everything else grounds to the busbar.
3. 120V Power with Inverter Integration
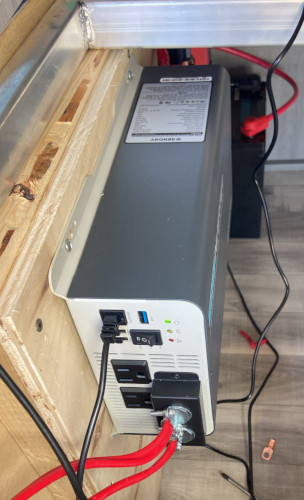
I installed the Renogy 1000W inverter which supports both battery-powered AC and pass-through from shore power thanks to its built-in UPS transfer switch. My RV came pre-wired with four 120V duplex outlets run in 12AWG Romex, and the manufacturer had conveniently left a loop for inverter integration.
Unfortunately, the loop wasn’t long enough to reach my install location, so I added a junction box and extended it with more 12AWG Romex, using WAGO connectors for safe splicing. This allowed the inverter to power all four interior outlets.
The 12AWG Romex is hard-wired into the inverter. The inverter also has two 120V AC outlets on its face, which are accessible in the storage compartment. These are handy for charging items stored inthe compartment or for plugging in an extension cord to run something outside.
The inverter automatically switches to pass-through mode when shore power is connected. If no AC input is present, and the inverter is turned on, it powers the outlets from the battery.
4. User-Friendly Controls
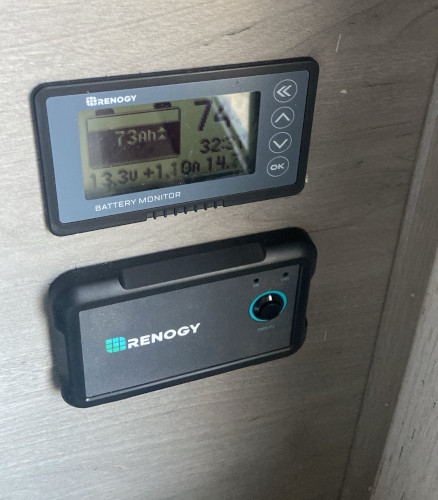
The battery monitor display is mounted in the living area near the door, making it easy to check just by opening the door—no need to step fully inside. It shows the state of charge, current consumption, and estimated time remaining at the current draw, so it’s easy to tell if we’re discharging or charging the battery.
The inverter has a remote switch which we mounted nearby, also in the living area of the RV near the main door. This means we can switch the inverter on and off without having to reach into the storage compartment.
⚡ Charging and Solar Setup
RV Converter Charging Quirks
While the RV came with a so-called “intelligent” converter, it doesn’t always detect the lithium battery’s discharge due to LiFePO4’s steady voltage profile. It’s not consistently entering bulk charging mode.
Temporary fix: when we arrive at shore power and want a top-up, we’ll switch on a load like the water pump or a fan to trigger the converter to wake up. We’re considering replacing the converter with a lithium-compatible unit for better reliability.
Truck Charging
The 7-pin trailer connection does provide a bit of charge while driving, though it’s limited. On a one-hour drive, I was able to get roughly 5Ah into the battery when it was at 10% state of charge. That drops significantly if the battery is already mostly full.
Portable Solar
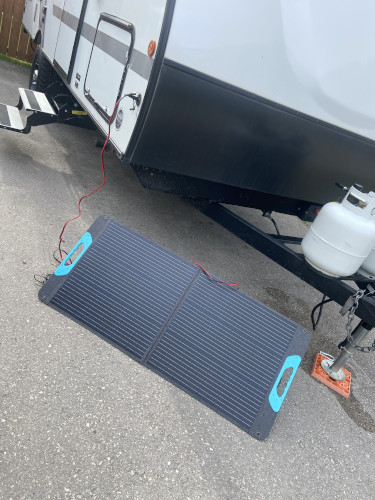
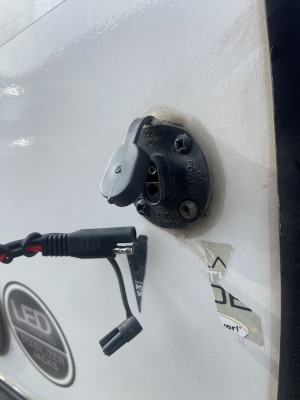
For now, we use a Renogy 100W portable panel paired with a Wanderer 10A PWM controller. The trailer came “solar ready” with a DC port on the side, branded as Go Power! Despite the marketing, it’s just a standard SAE connector with reverse polarity.
Roof Solar Expansion
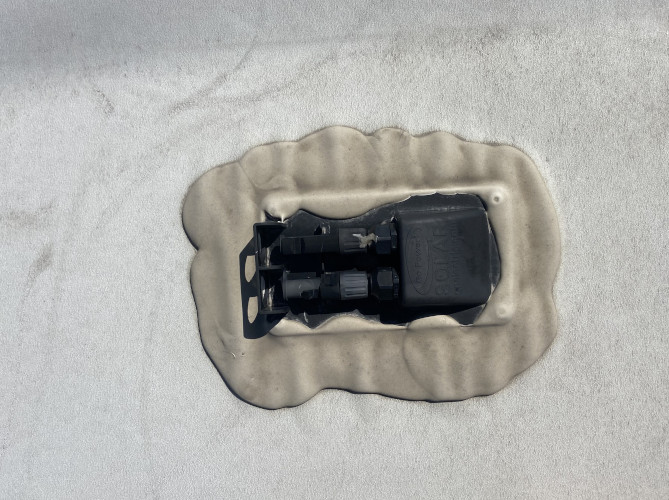
The RV also came pre-wired for roof solar. It has MC4 connectors on the roof with 10AWG wire running down into the front passthrough compartment, where the ends are currently capped off. Eventually, we plan to mount 200W of panels on the roof and connect them to an MPPT charge controller mounted inside the storage compartment. We’ll also keep the option open to bring 100–400W of portable panels for additional power when staying at unpowered sites.
📻 Amateur Radio Power
We power our amateur radio setup in a few different ways depending on where and how we’re operating. When working outside at a picnic table, we use the solar power connection on the side of the trailer. An SAE extension cord allows us to bring power out to the table, so we can run the HF radio directly from the trailer’s battery system without needing a separate battery.
When the weather isn’t cooperating and we want to operate from inside the trailer, we use a DC power outlet located near the dinette table. This gives us a clean 12V feed from the battery system, again without the need for additional gear.
If we’re trying to conserve the trailer’s battery capacity or the extension cords don’t reach where we want to operate, we fall back to our Jackery Explorer 240. It’s been a fantastic backup option and can be recharged from the trailer’s system or directly using the Renogy portable solar panel with compatible connectors.
🔍 Lessons Learned
- Watch for polarity mismatches on so-called “proprietary” plugs.
- Check converter compatibility with lithium batteries—many OEM models are not true LiFePO4 chargers.
- Spare cable length matters. Manufacturer pre-wiring often assumes you’ll mount gear in their designated spots—flexibility requires junctions and extra wire.
- Remote controls are worth it. Having power monitoring and inverter controls near the door makes life easier.
📦 Final Thoughts
This isn’t a commercial or professional setup—just something that works for how we like to camp. We often choose unpowered campsites and prefer not to rely on shore power. Even when it’s available, campground power can be unreliable, so we’ve set ourselves up to be self-sufficient. I’ll keep tweaking things over time, like adding the second battery and roof panels. Hopefully, this gives someone else a starting point or some ideas.
If you’ve got questions or are setting up something similar, feel free to reach out. Happy to share what I learned.