Tracing Coax in My Kodiak Cub 175BH
One thing I wanted to figure out early on in my 2022 Kodiak Cub 175BH was how the coaxial wiring was set up. Between roof antennas, wall plates, and external cable hookups, it wasn’t immediately clear how everything was connected — or how to use it properly.
So I traced out every coax run in the trailer, documented where everything goes, and mapped it all into a single diagram. If you’re trying to troubleshoot your own RV setup or plan an upgrade, this might save you a lot of head-scratching.
Wiring Overview Diagram
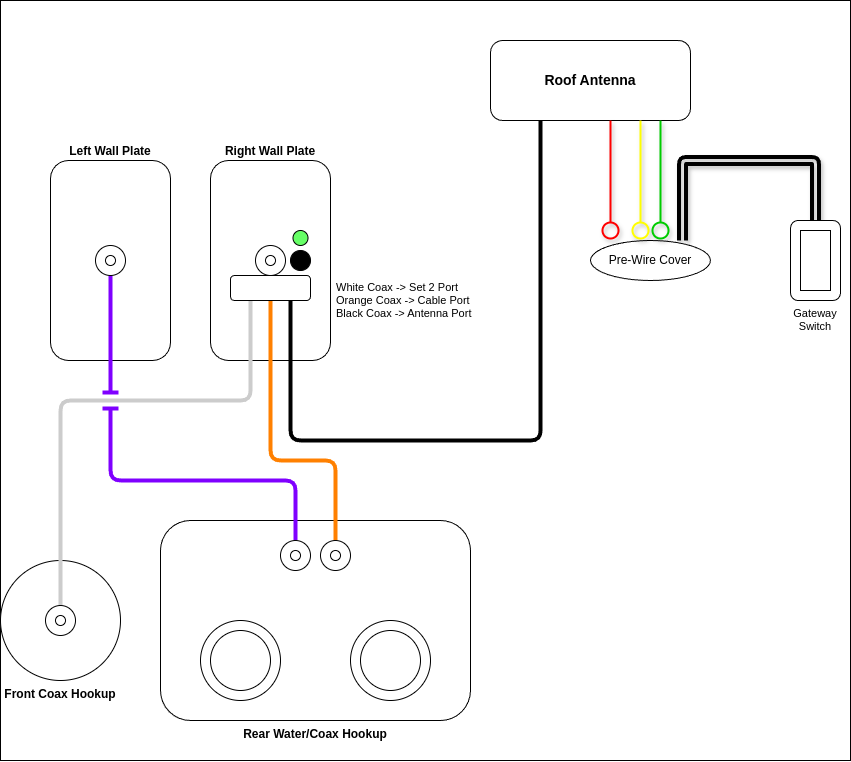
Here’s a visual map of how the coax and 12V power lines are laid out in my Kodiak Cub. This should help you follow along with the sections below:
Rear connections: Starting Point
On the backside of the trailer, near the fresh water hookups, you’ll find two coax connectors:
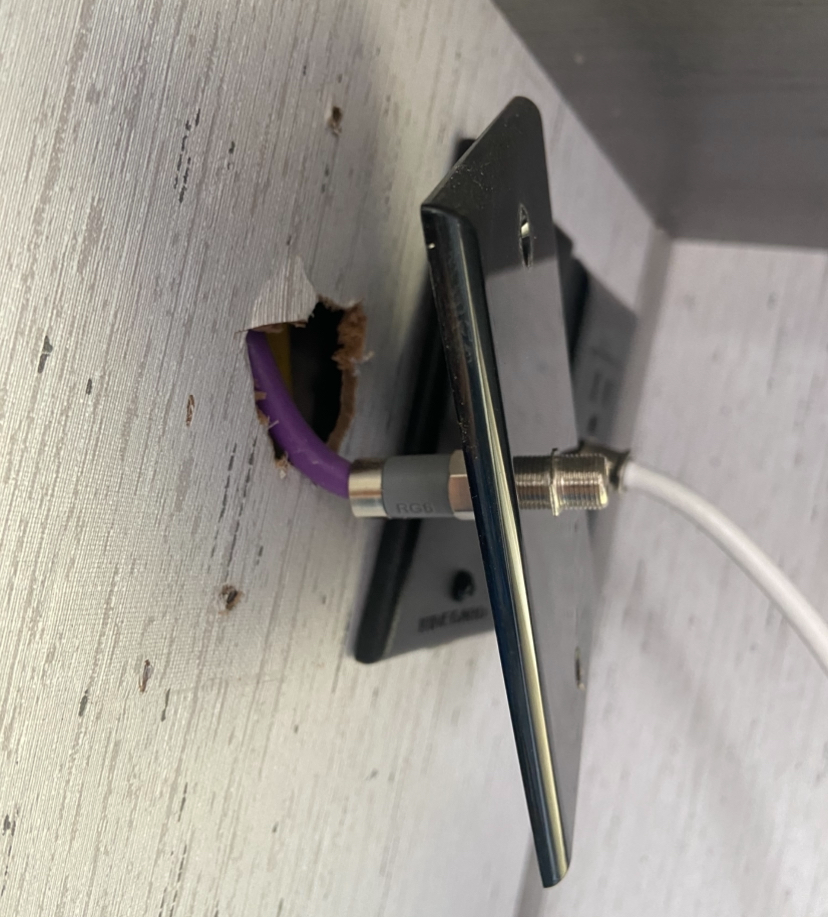
- Purple coax - runs directly to a basic interior wall plate
- Orange coax - feeds into the powered wall plate (Part# RV-074543), which acts as the central switch for antenna/cable signals.
These connections are the primary signal entry into the RV.

The Purple Line: A Direct Bypass for Satellite?
The purple coax line runs from the exterior coax input straight to an interior wall plate - bypassing any amplifiers or switches. There’s no connection to the powered wall plate or antenna system.
I suspect this line is designed as a clean, direct path for satellite receivers or other signal-sensitive equipment. Satellite systems often require an unamplified, uninterrupted signal from teh dish to the receiver. This dedicated line avoids any potential interference or signal loss that might be introduced by the Winegard’s amplifier circuitry or switching logic.
So if you’re planning to use a satellite dish or park cable box that doesn’t play well with distribution amps, this is likely the port you want to use.
The Powered Wall Plate
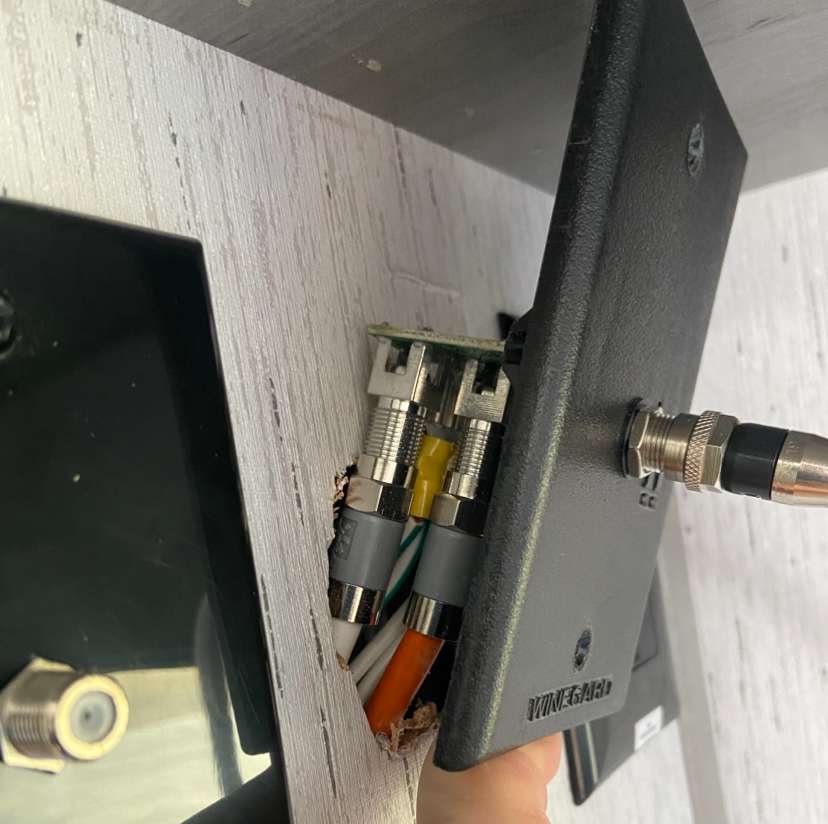
This wall plate ties everything together and powers the antenna’s internal amplifier. On the back, it has:
- Black coax - from the Winegard Air 360+ on the roof
- Orange coax - from the exterior cable connection at the fresh water panel
- White coax - goes to the secondary TV location on the front side of the trailer (under the awning)
It also includes:
- A power button
- An LED indicator
How it works:
- Button ON (LED lit): Sends 12V to the Winegard antenna for over-the-air reception and allows signal from the black line through to the output
- Button OFF (LED off): Passes campground cable signal from the orange line through to the output
Outside TV Connection
The white coax from the powered wall plate mirrors the signal sent to the main interior TV connection, allowing for an outdoor TV setup under the awning. It leads to the front-side exterior TV mount, located under the awning. This gives you the option to watch OTA or cable TV outside, depending on the wall plate switch setting.
Winegard Air 360+ and Gateway 4G Prewire
The roof-mounted Winegard Air 360+ handles your over-the-air (OTA) TV reception and houses built-in antennas for WiFi and 4G/LTE — but by itself, it’s just a passive antenna system. It doesn’t actually connect you to the internet.
For that, you need to add the optional Winegard Gateway, which connects to the prewired port under the dome.
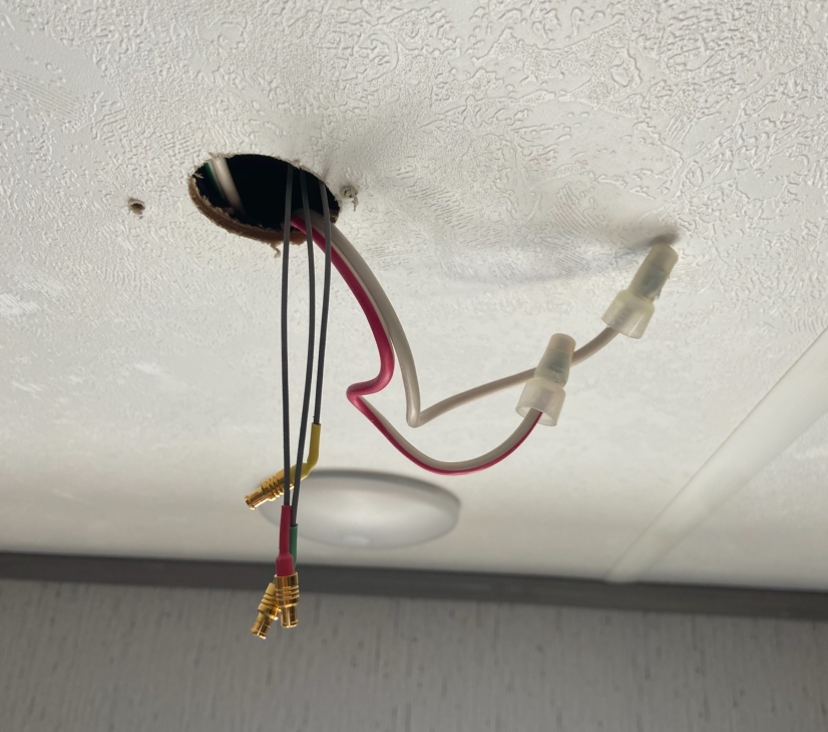
Beneath a cover plate on the ceiling of the RV, you’ll find:
- 12V power - supplied from a switch (Part# WP2-100) near the trailer’s main control panel
- Three MCX-terminated coax wires:
- Red - WiFi
- Yellow - LTE antenna #1
- Green - LTE antenna #2
Why I Don’t Recommend the Gateway
Honestly, I don’t think the Gateway is worth it. It’s pricey, offers limited flexibility, and locks you into Winegard’s ecosystem.
Instead, I use a GL-iNet Beryl AX travel router, which does the same job — and much more:
- Repeats campground WiFi
- Accepts USB tethering (my usual setup is USB to my iPhone)
- Supports LTE modems
- Can connect wired systems like Starlink via Ethernet
I’ve also configured mine to create a VPN tunnel back to my home network, giving me secure access to my devices from anywhere on the road.
GL-iNet routers cost about $150 CAD and come with features like:
- Built-in WireGuard/OpenVPN support
- Advanced routing and firewall options
- No proprietary app lock-in or forced subscriptions
There are other solid brands too, but travel routers like this are far more versatile and upgradable than the Gateway — and you’re not stuck with a closed system.