Building an outdoor ADS-B Receiver
This is the build of my outdoor, Raspberry Pi based ADS-B receiver. I’ve wanted to build a project like this for a while, and this was my first attempt.
The why
I’m an aviation nerd who lives near a reasonably sized international airport. I’ve been in the hobby for about a decade now. I started with a RTL-SDR with the included antenna trimmed for 1090 MHz on a cookie can inside a window. When I upgraded to an outdoor antenna, there is only so much antenna cable so keeping the receiver indoors started to become impractical. I’ve built my own systems since I like to feed more than one aggregator and enjoy the flexibility.
Hardware - What’s in the box
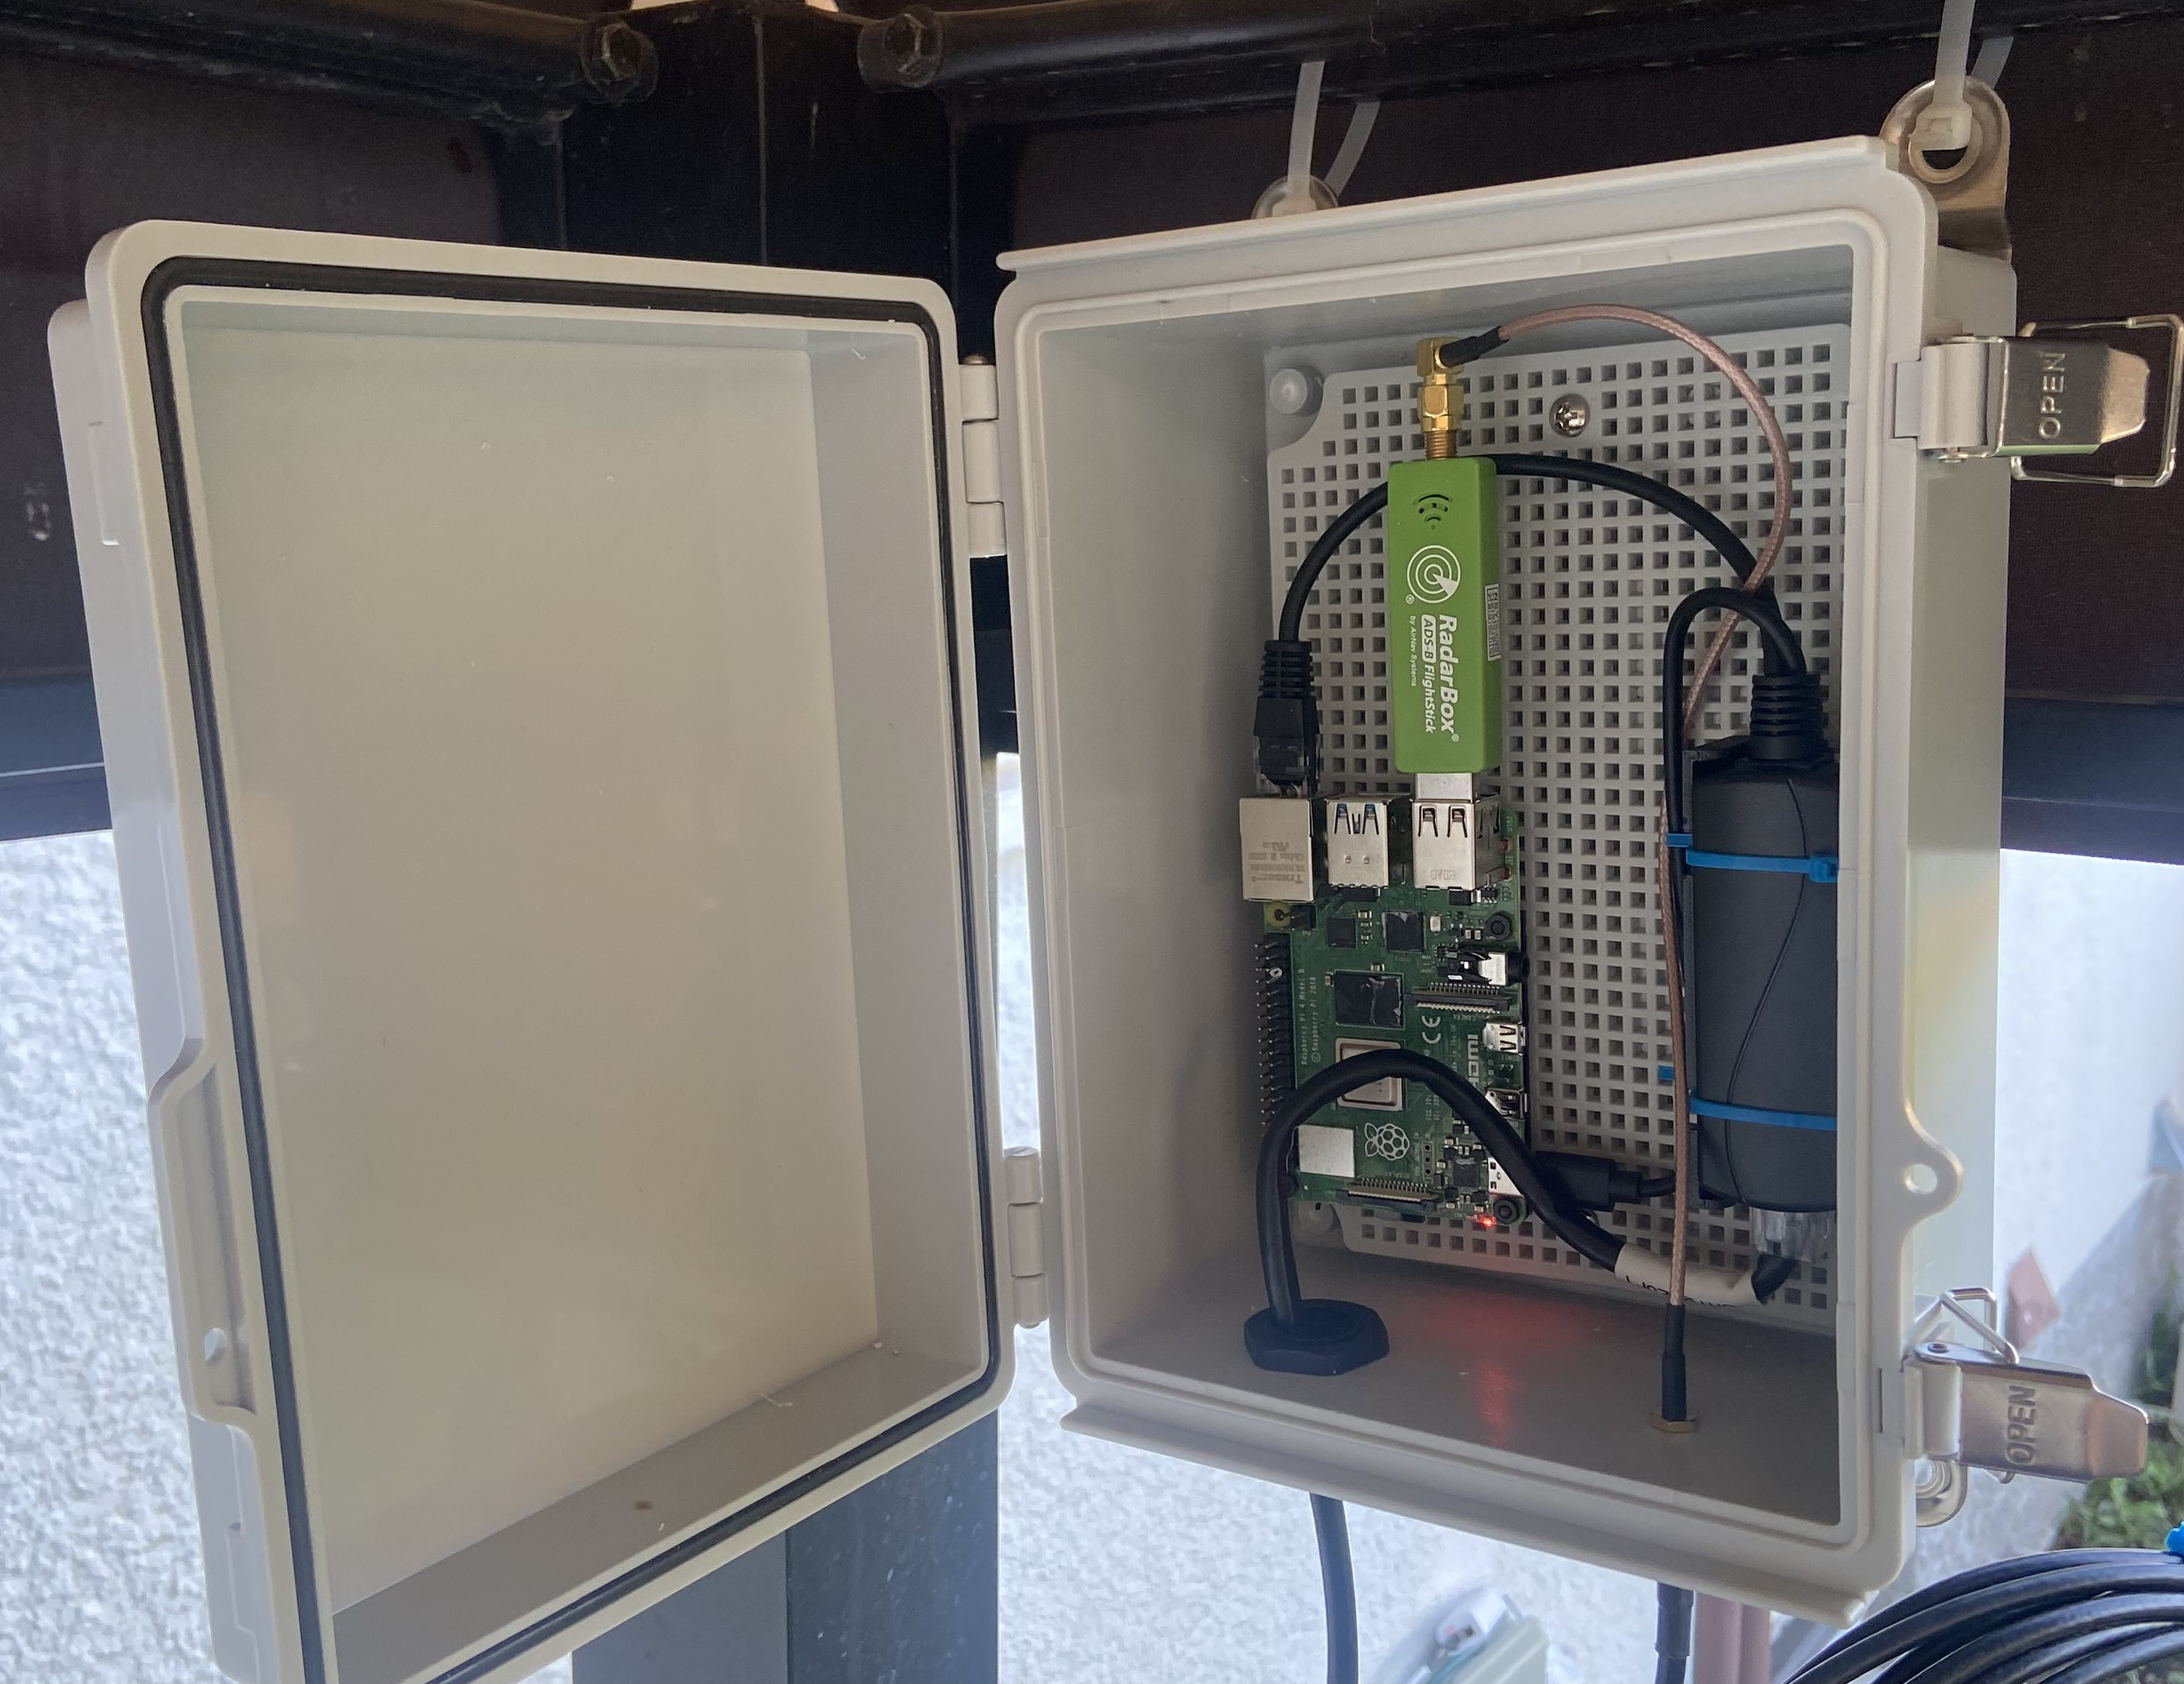
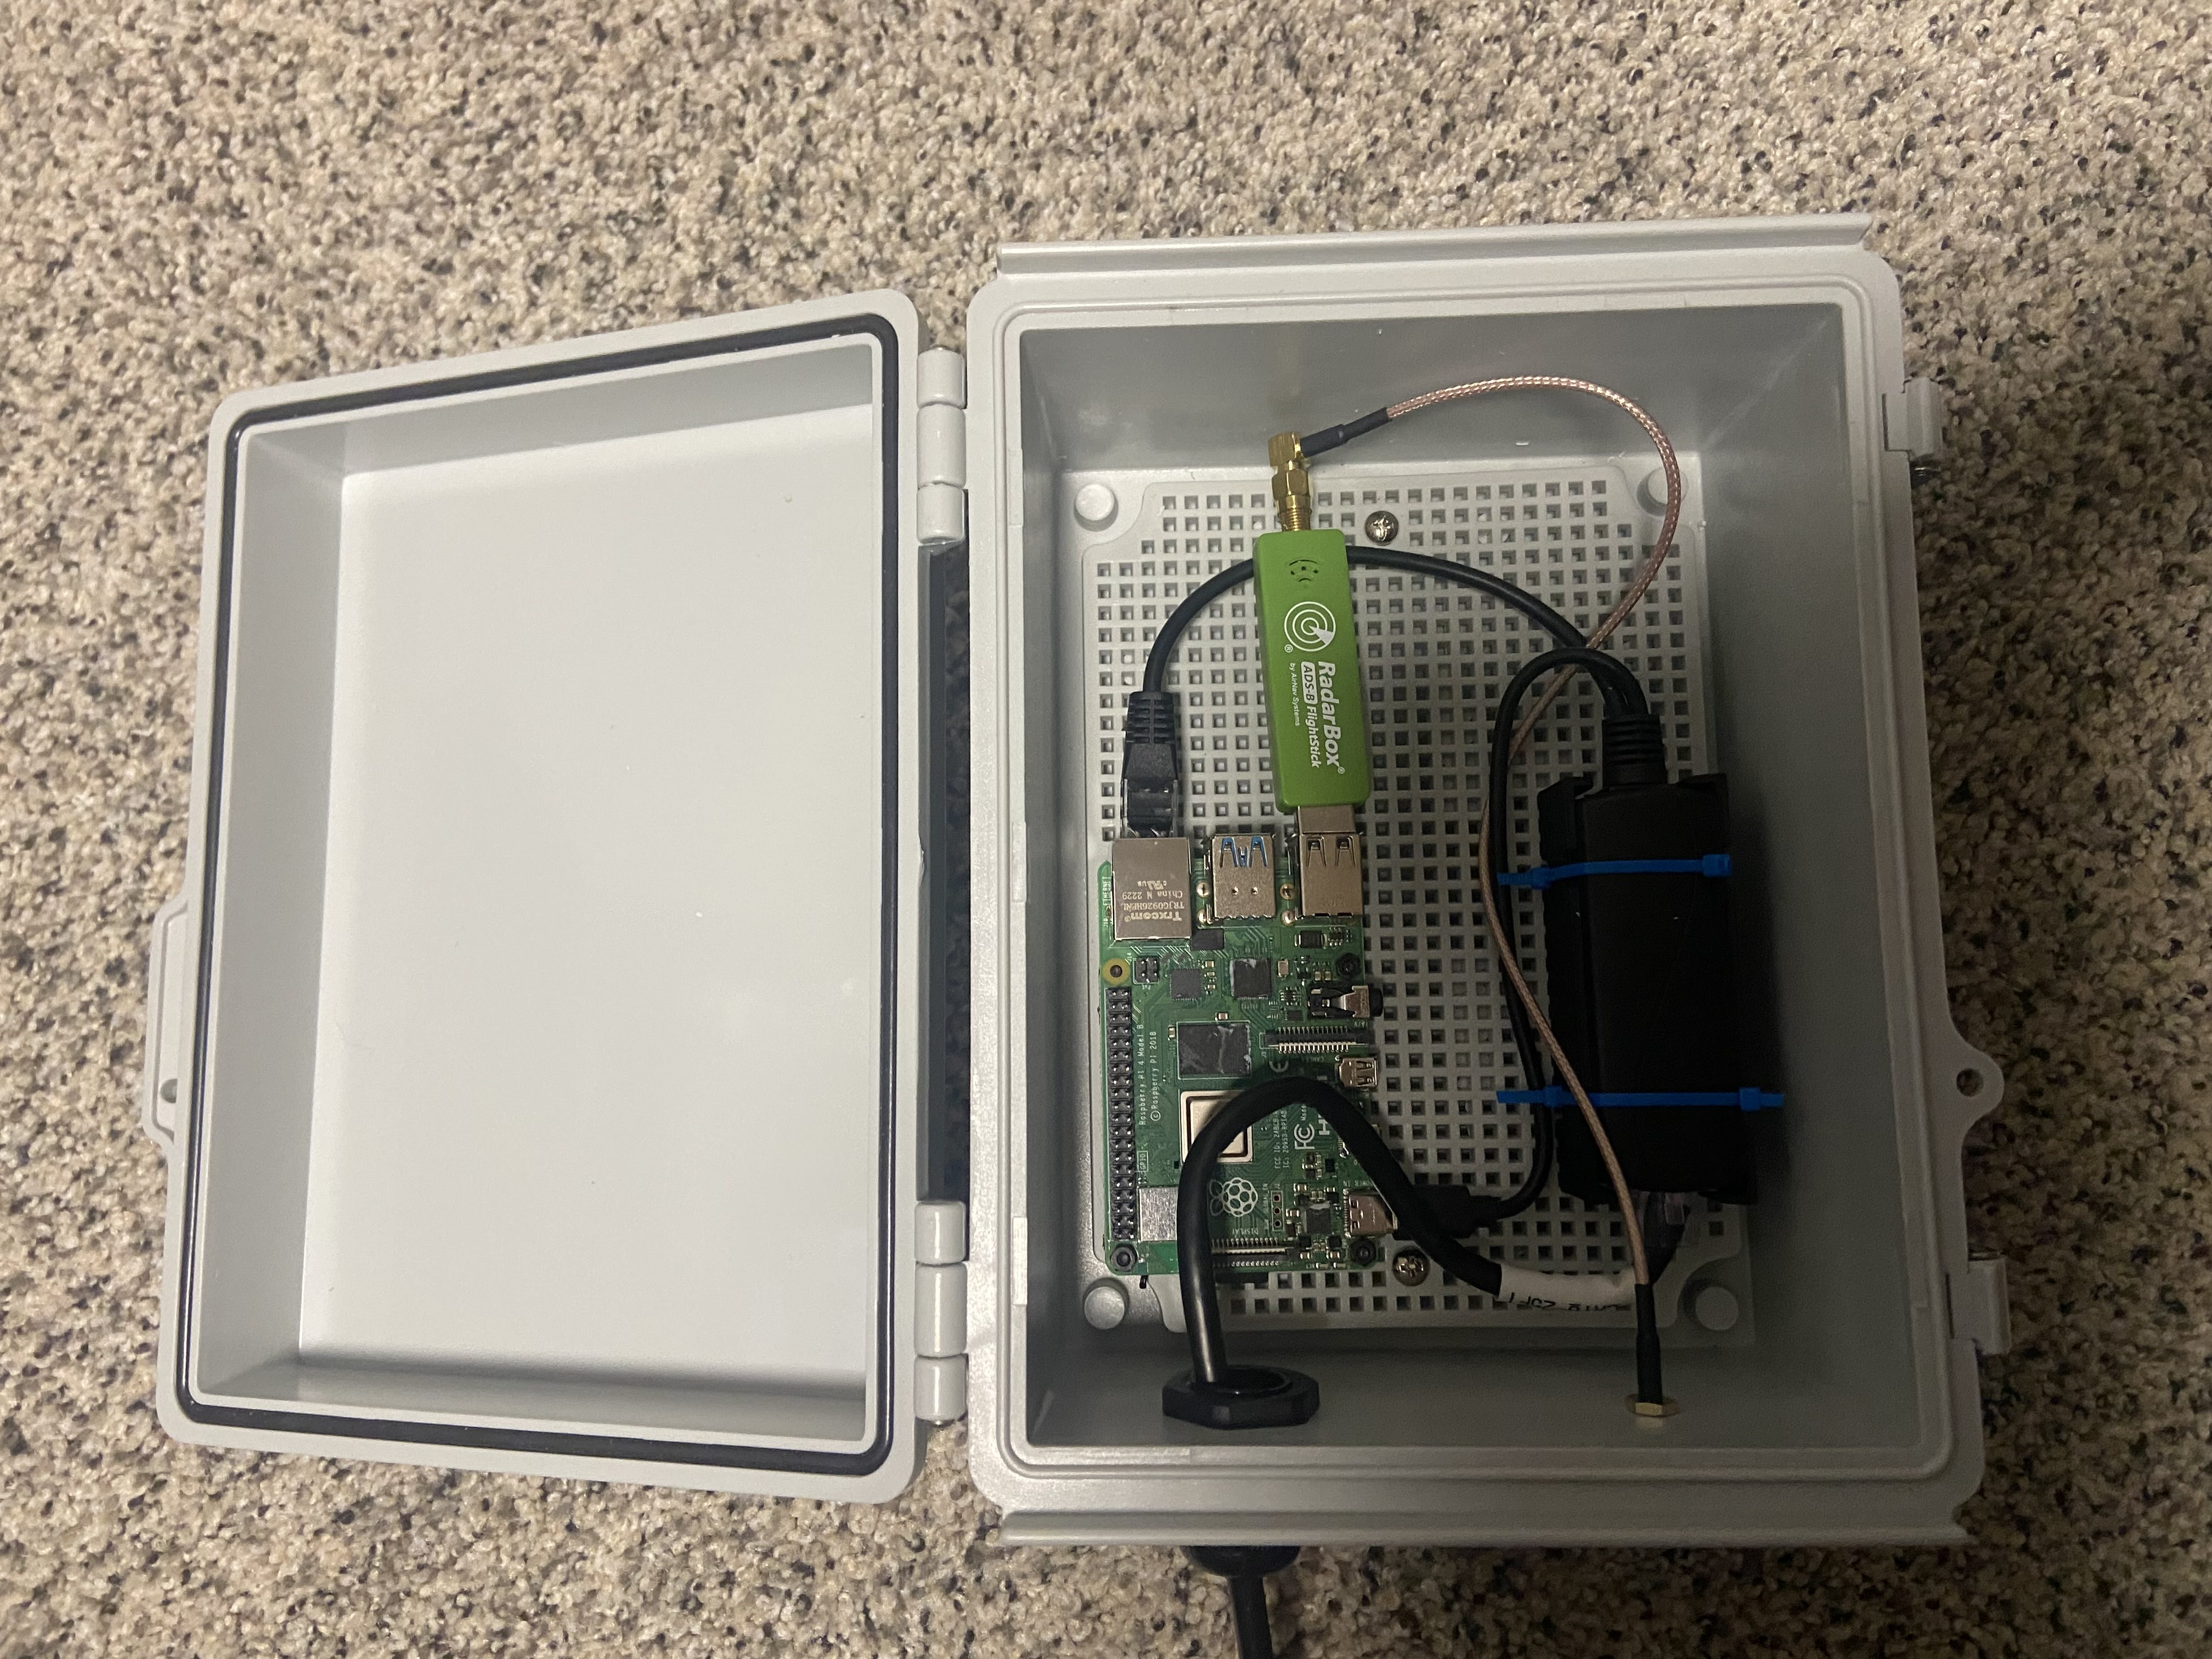
- Compute: A Raspberry Pi 4, 4GB. 4GB because it’s what I had already. 2GB would more than suffice if you’re buying new.
- Power: PoE Splitter that gives me a USB-C connection to the Raspberry Pi power connector and a network cable. Yes, I could use a PoE HAT, but this splitter was cheaper and I could get 2-day shipping from Amazon.
- Radio: I have an AirNav RadarBox FlightStick. I like it because it’s a USB dongle with everything you need for ADS-B reception. It has a built-in filter and preamplifier so you don’t need anything extra like if you bought just an RTL-SDR. I know the hardware is compatible and it just works out of the box.
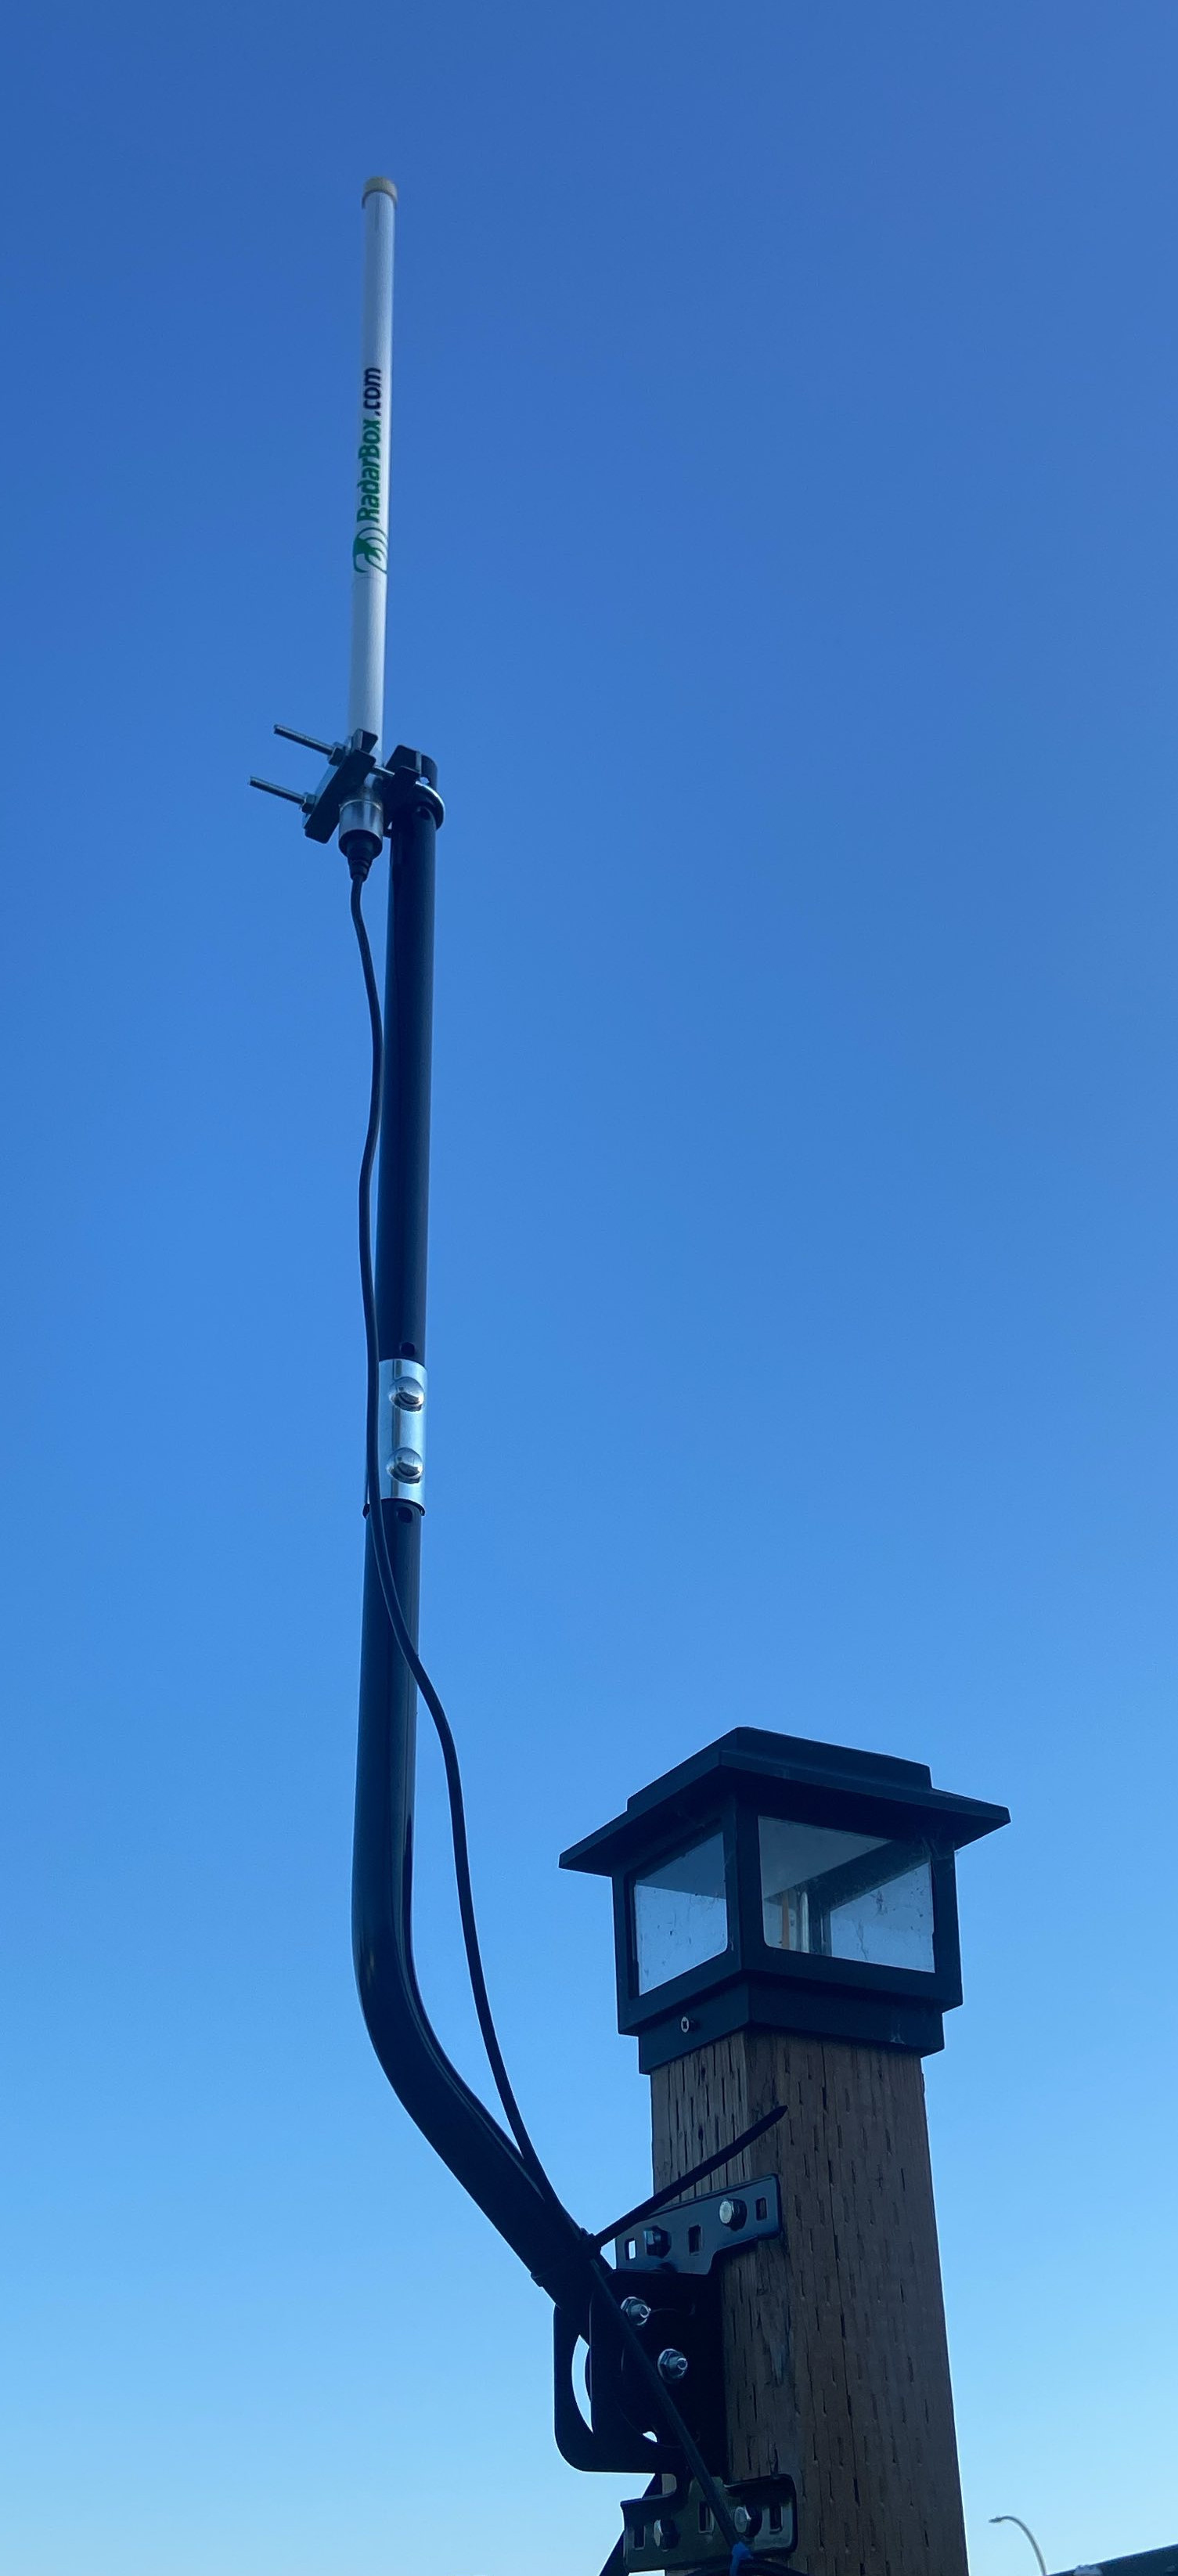
- Antenna: I have the AirNav Radar ADS-B 1090 MHz Outdoor Antenna with SMA connector. It’s been great. Noticeably better gain than my trimmed down homebrew situation I had before. It is solid and mounts well to a pipe mast. I’ve had it for 3 years now, and it’s holding up great.
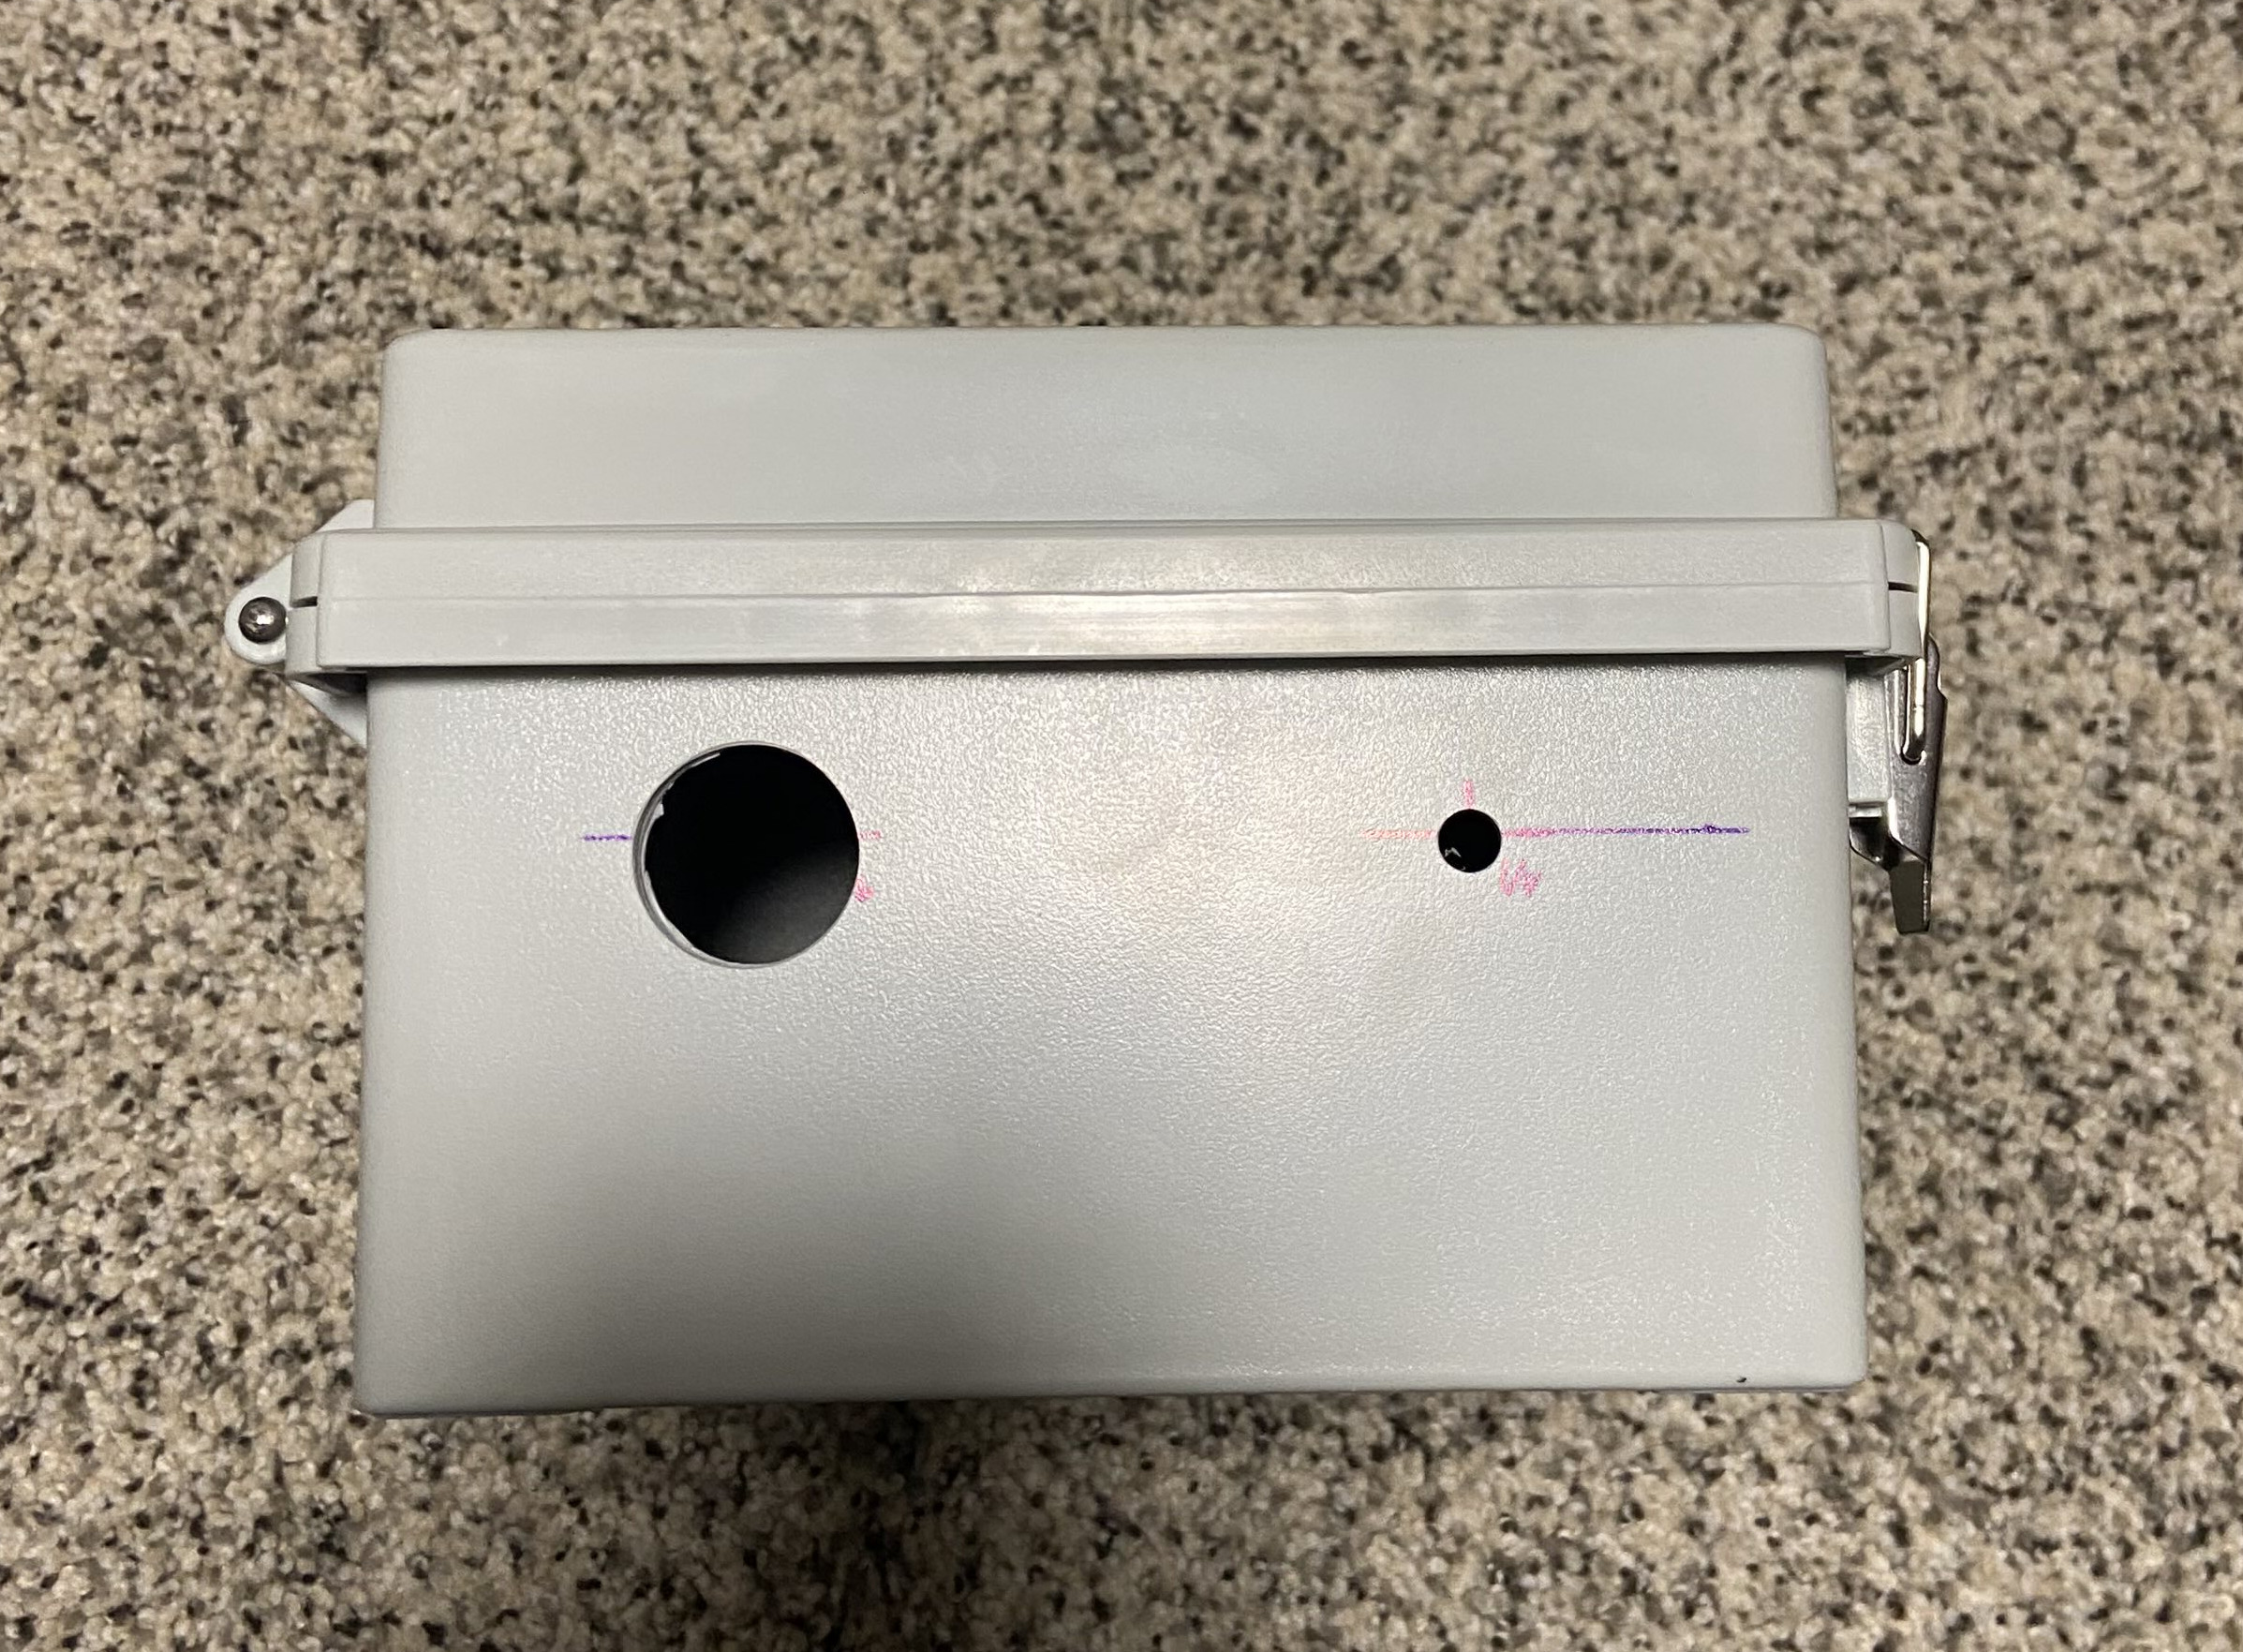
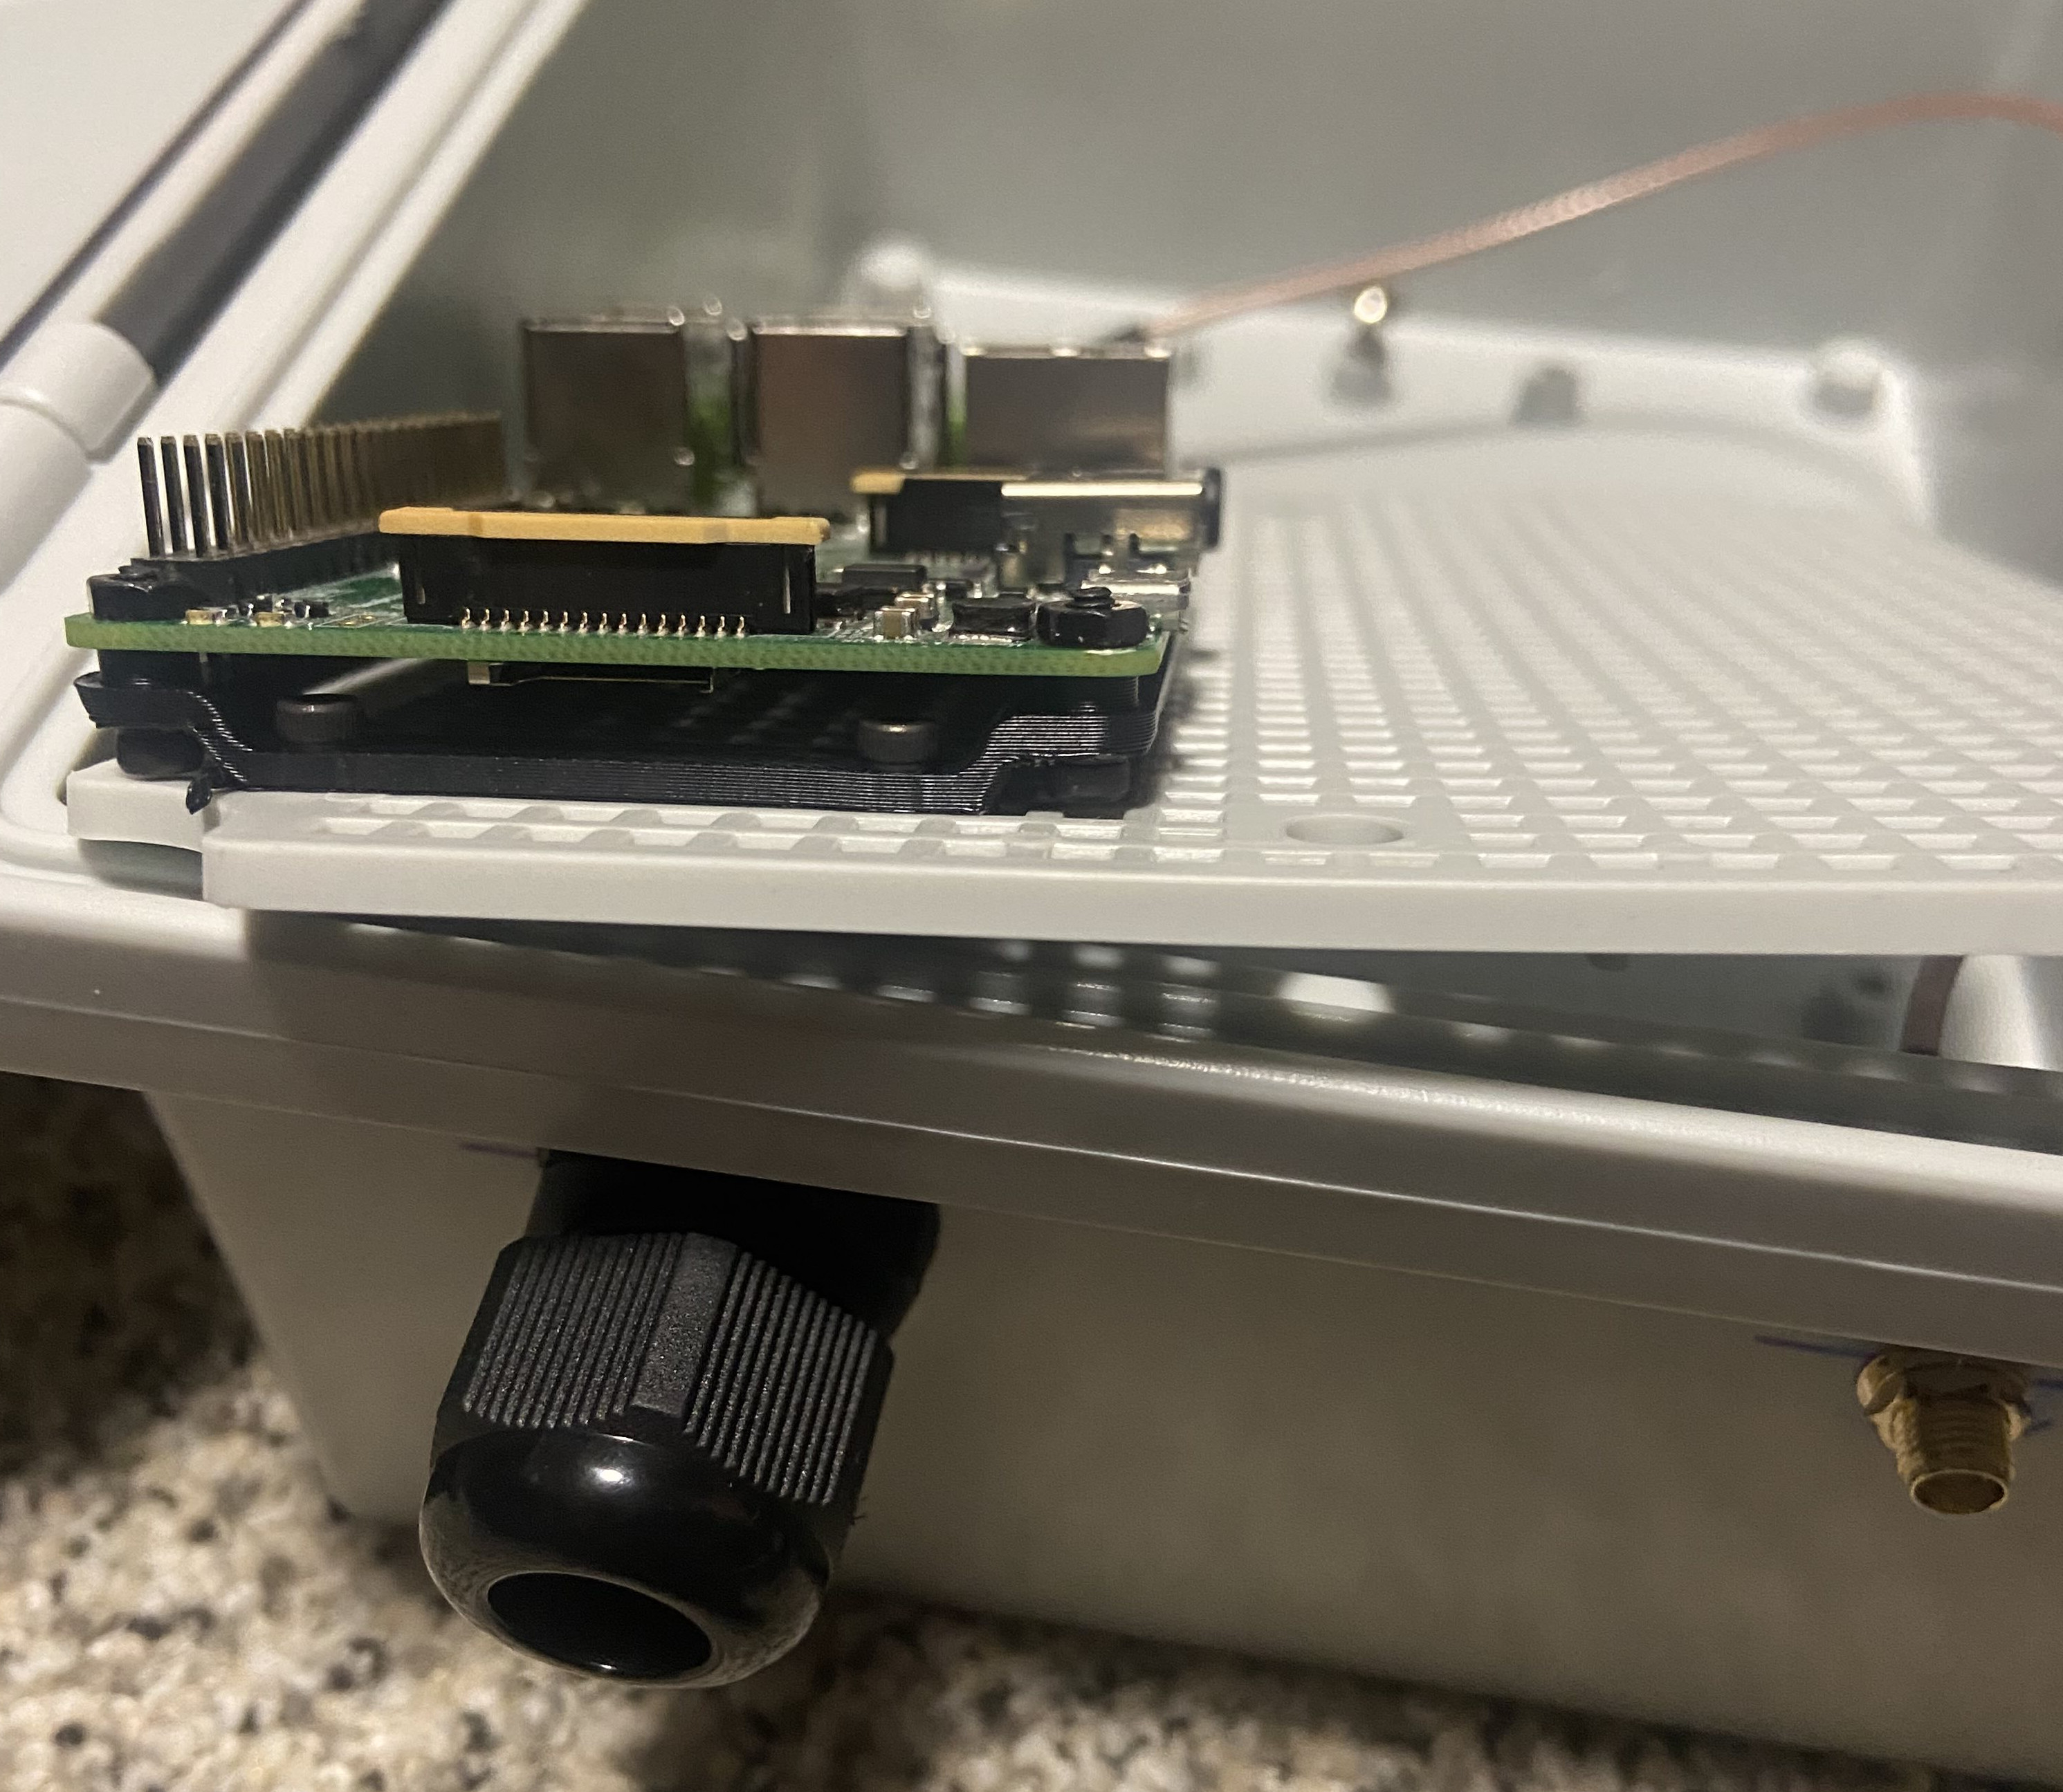
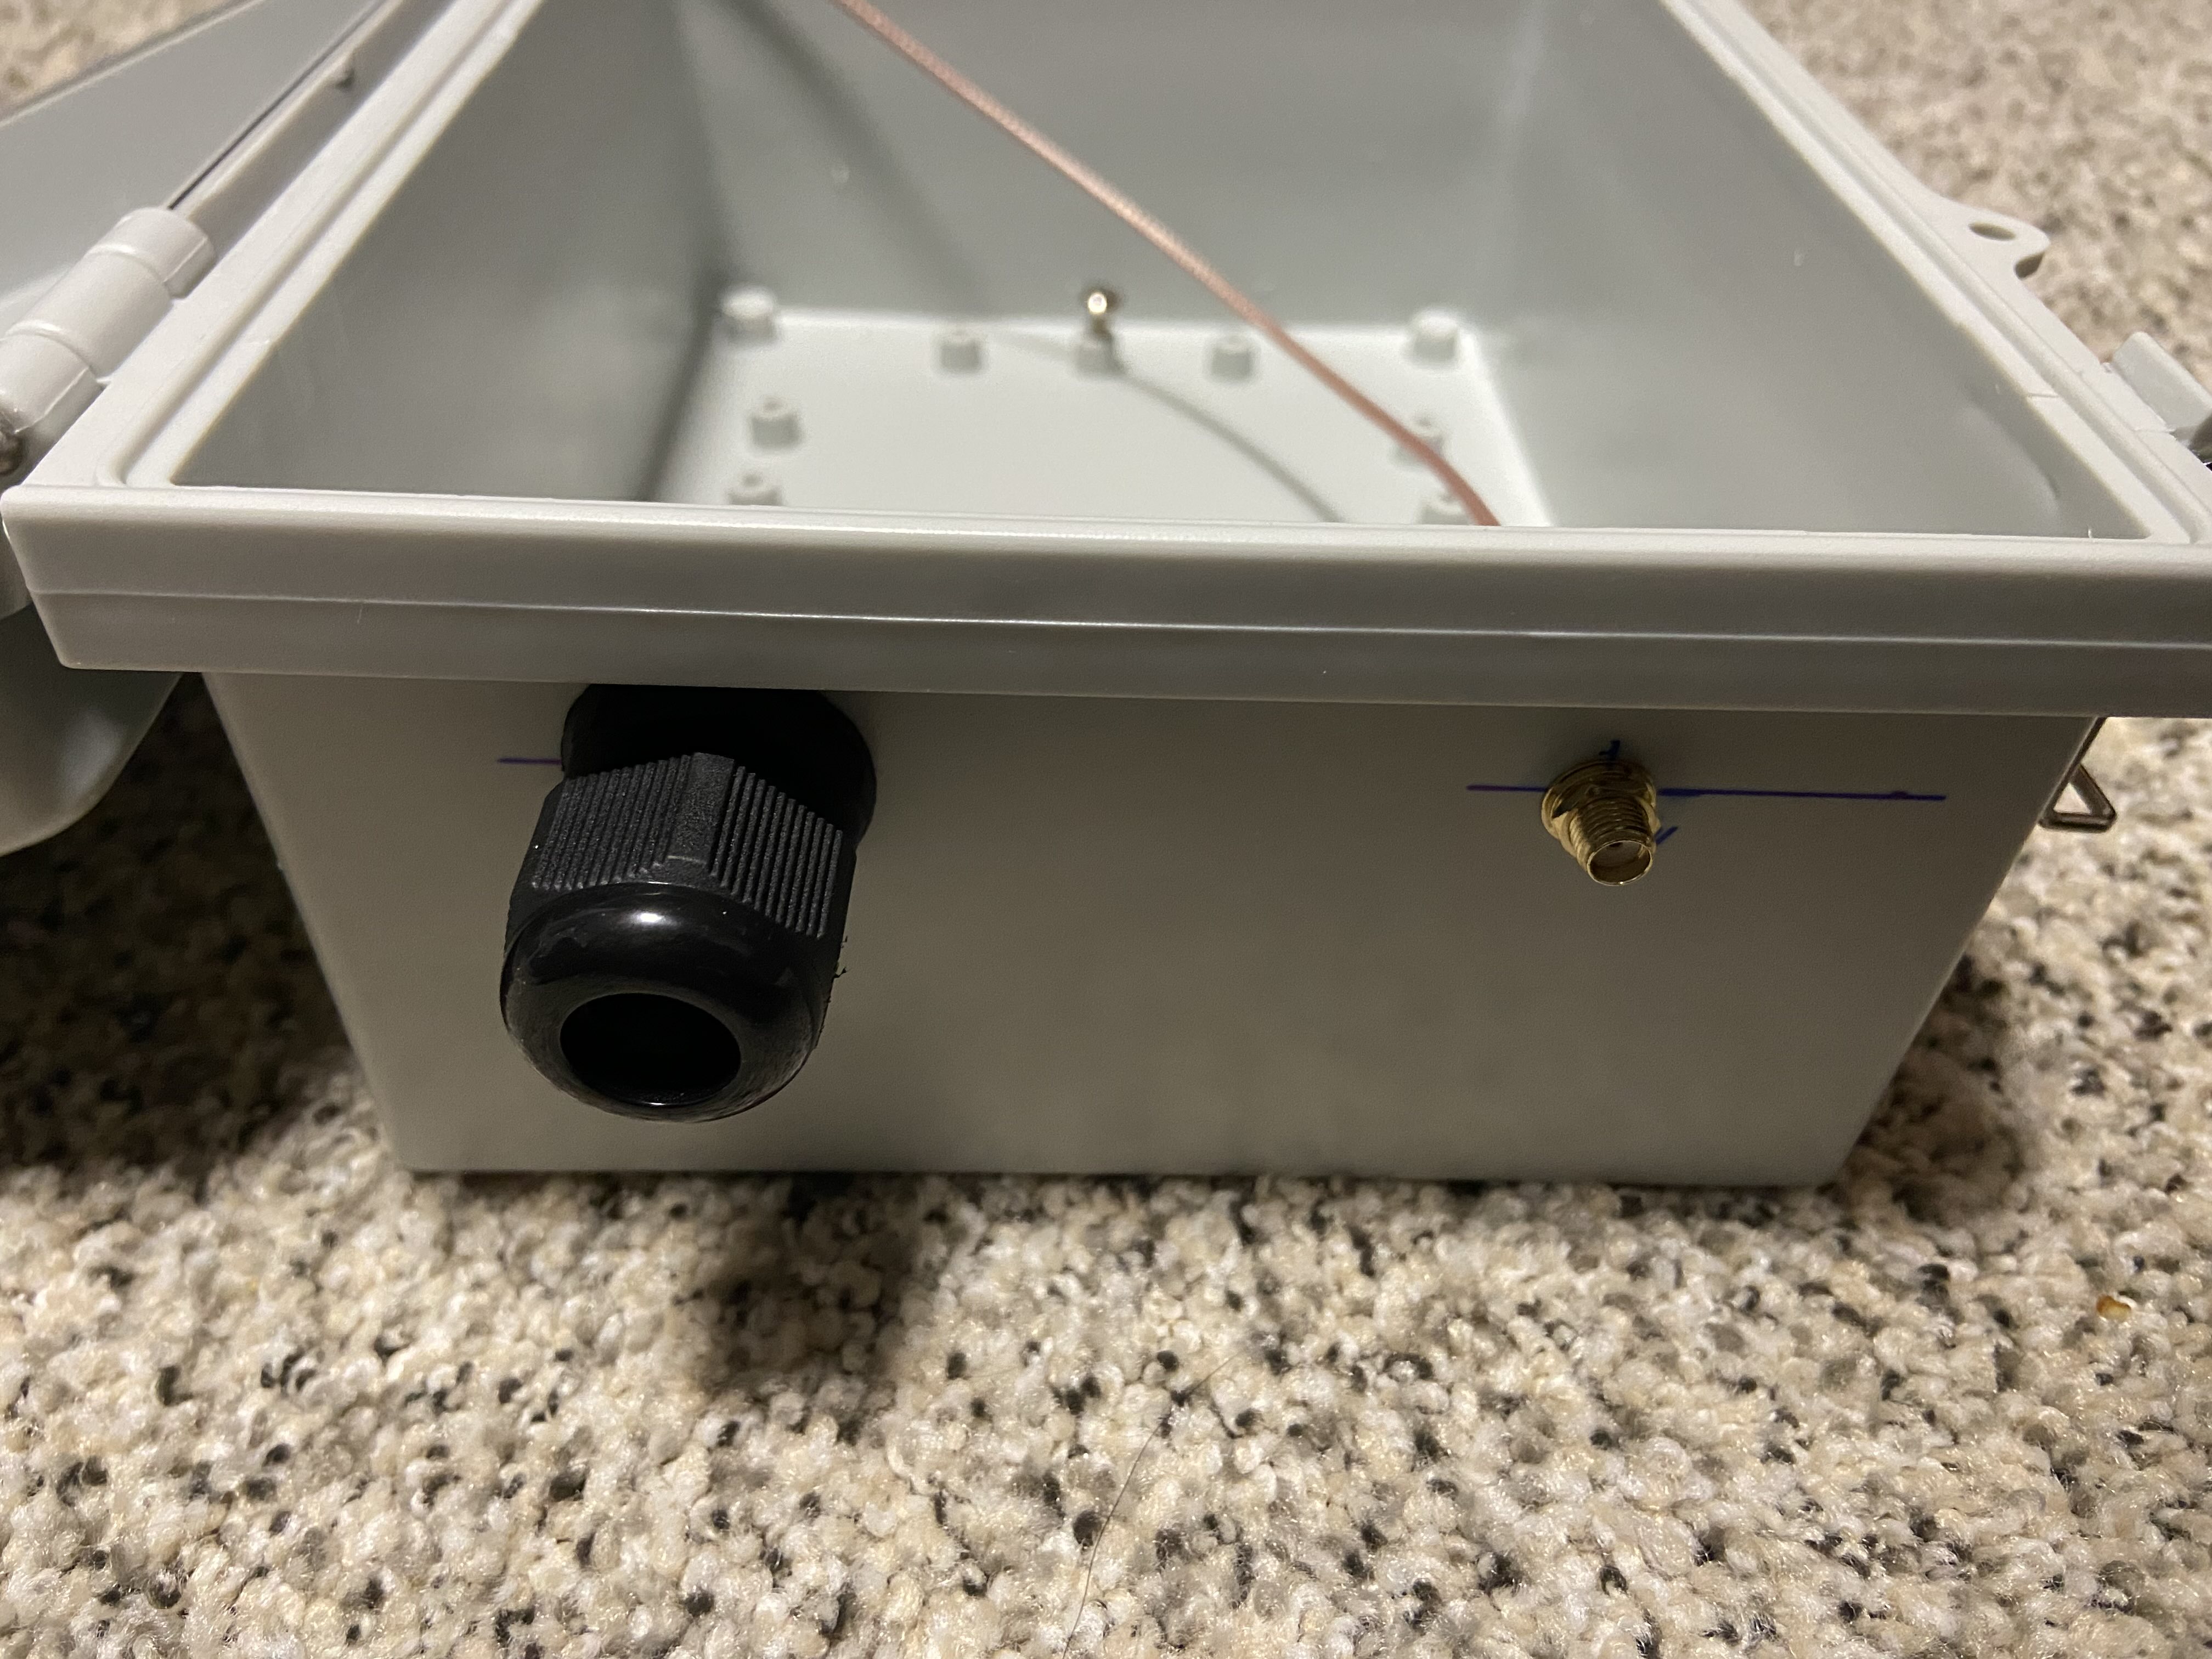
- RF plumbing: Inside the enclosure, a short RG316 pigtail with a 90 degree SMA on the dongle side and an SMA bulkhead through the enclosure wall. This takes the mechanical stress off the SDR and the bulkhead connector keeps critters out of the box. It’s not weatherproof, but it’s mounted on the bottom of the box and I’m happy with it.
- Penetrations: I used a cable gland appropriately sized for some outdoor rated CAT6 cable from Amazon. This provides a nice seal that should be weatherproof.
- Custom Prints: I used my 3D printer (Bambu Lab P1S) for two custom parts. First, I needed a backer plate that adapts the Pi’s mounting pattern to the box’s 5mm grid. It also gave me some standoff. Second, a small brace to keep the PoE splitter straight and secure.
- Mast Hardware: I got an inexpensive Antenna Mast Pole from Amazon, similar to what attaches to the back of satellite dishes. This seemed like an easy way to get some additional height and give me a pole to mount to.
Software
Previously, I would install Raspberry Pi OS and then install the feeder software through a script from somewhere like Airplanes.Live. I would then have to manually add other aggregators, and it was quite labour intensive and finicky to get everything to play nice.
While getting ready to do the same thing, I was browsing the Raspberry Pi Imager and stumbled on ADS-B Feeder Image. It packages a purpose-built OS with SDR Enthusiast pre-configured docker containers for all the popular aggregators. Once I got that flashed on the SD card, I got to a setup screen, punched in my settings and was up and running in a couple minutes.
The image also supports ACARS, HFDL, VDL2, AIS, SONDE, which I intend to experiment with later.
Build walkthrough
- Layout and Drilling: Laid the Raspberry Pi, Receiver dongle and PoE Splitter in the box. Measured and marked the bottom of the enclosure for the cable gland (CAT6 cable) and the SMA bulkhead. Tried to line them up on a centre line to make them pretty. Lesson learned, leave this to the last step…
- Mounting the Pi: The 3D-printed adapter plate aligns to the backplate’s 5mm grid. M2.5 screws were used to attach the standoff to the back plate and the Pi to the standoff. This standoff ensures I have enough room for thicker USB cable ends, etc.
- Power Path: CAT6 enters via the gland, to the PoE splitter, then short USB-C pigtail to the Pi. A brace supports the main splitter body so it doesn’t flop around.
- RF Path: Outside antenna enters via the bulkhead connector to a short piece of RG316 directly into the FlightStick. A right-angle SMA at the dongle reduces strain and keeps the SDR from applying pressure inside the USB port. No, I don’t have lightning protection. I’m not overly worried and if it fries the dongle and Pi, so be it. The ethernet cable will have lightning protection in the final setup.
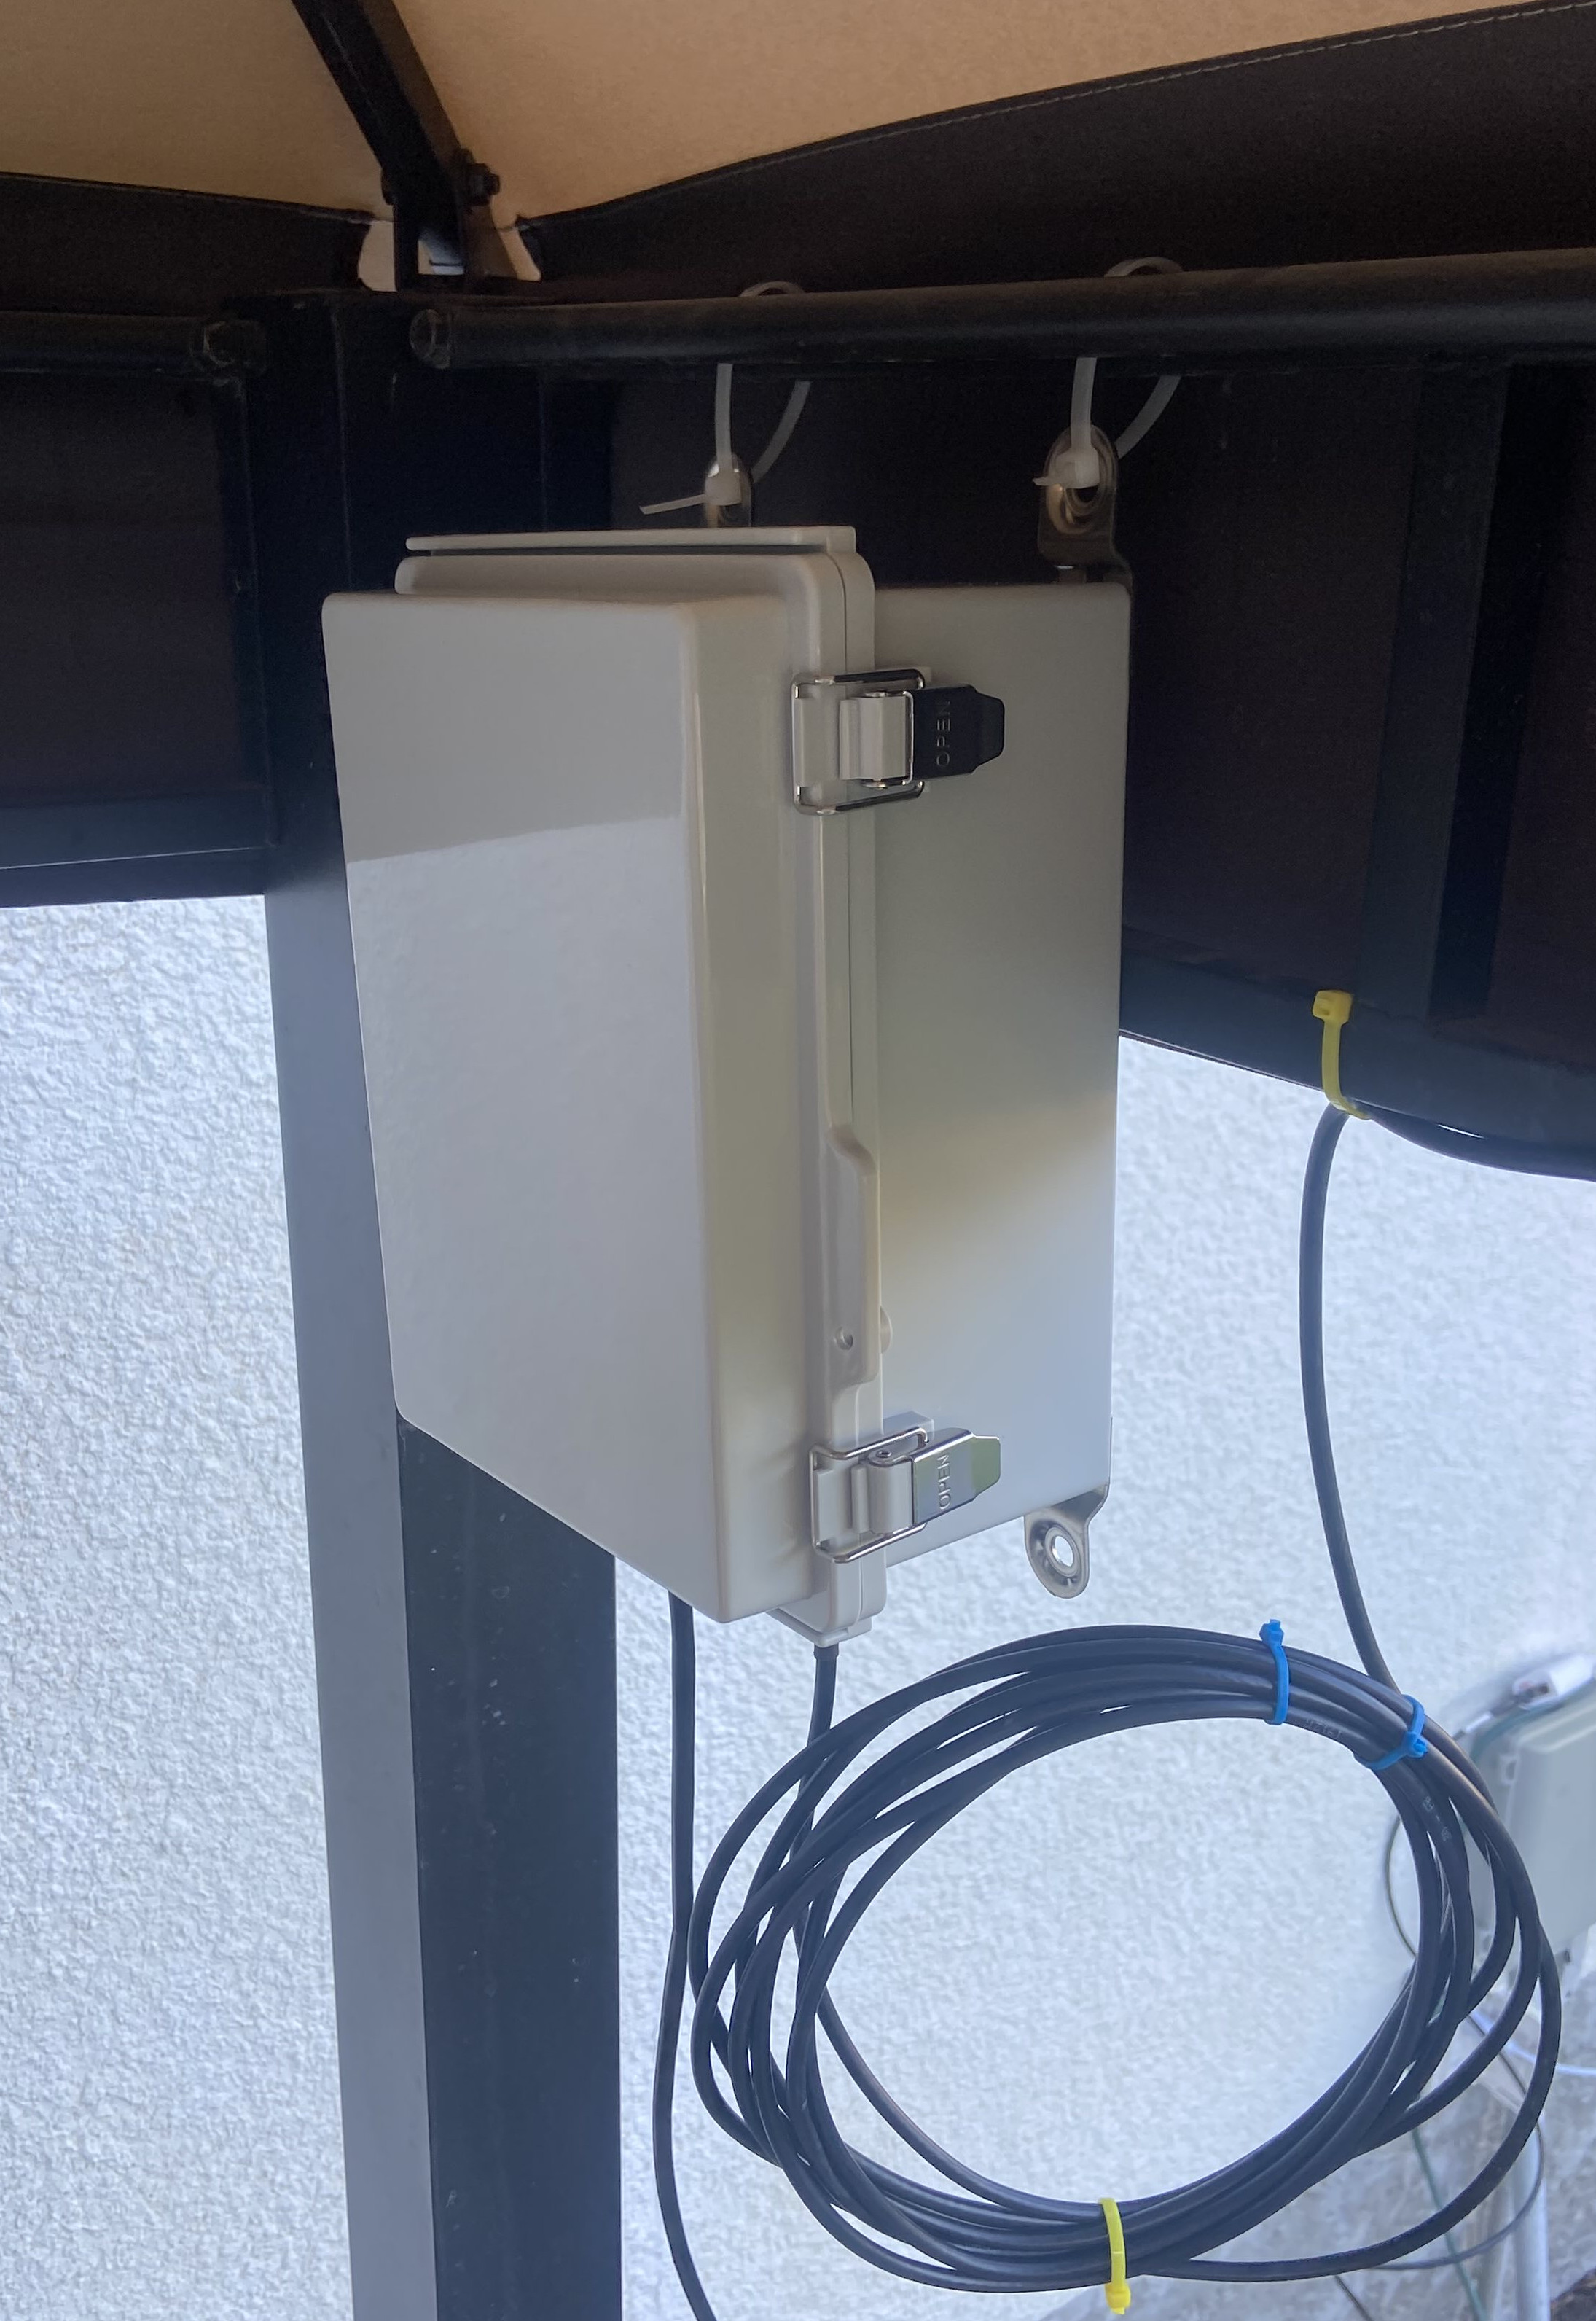
- Cable management: I tried to zip tie the antenna cables, etc neatly and added some service loops to prevent a large amount of water from heading towards the bulkhead connection.
- Antenna mount: Antenna mounted on a cheap mast from Amazon with a U-Bolt.
Site selection
My neighborhood is bungalow heavy with almost no tall buildings for a few kilometers all around. It’s the prairies, so the land is flat as well. Line of sight is everything with 1090 MHz. The current mast height, around 10 feet in elevation, is a very minor compromise and I miss only the lowest of aircraft. I’m close enough to the airport that I see them basically to the ground. Eventually, I want to set up a 35 foot antenna tower for Amateur Radio, and this ADS-B antenna will likely get a prominent spot on that tower.
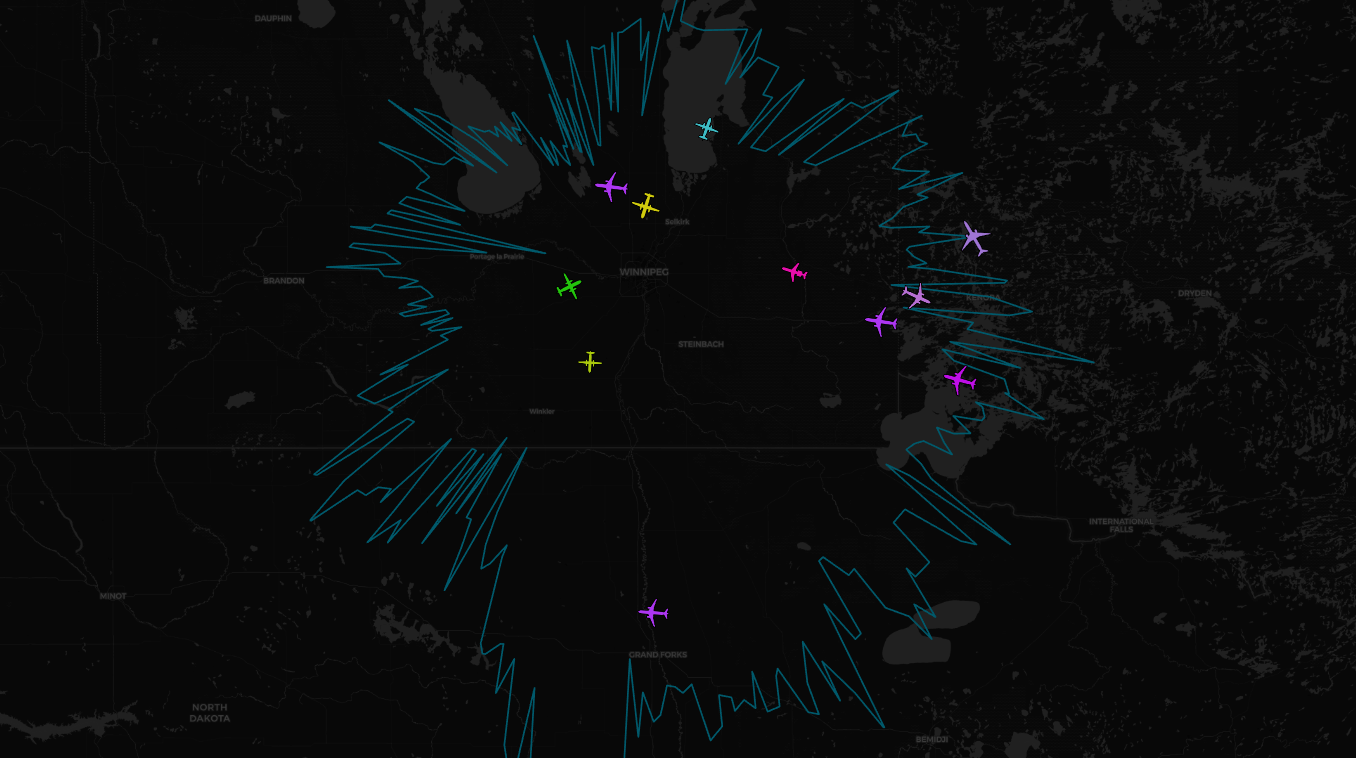
Performance
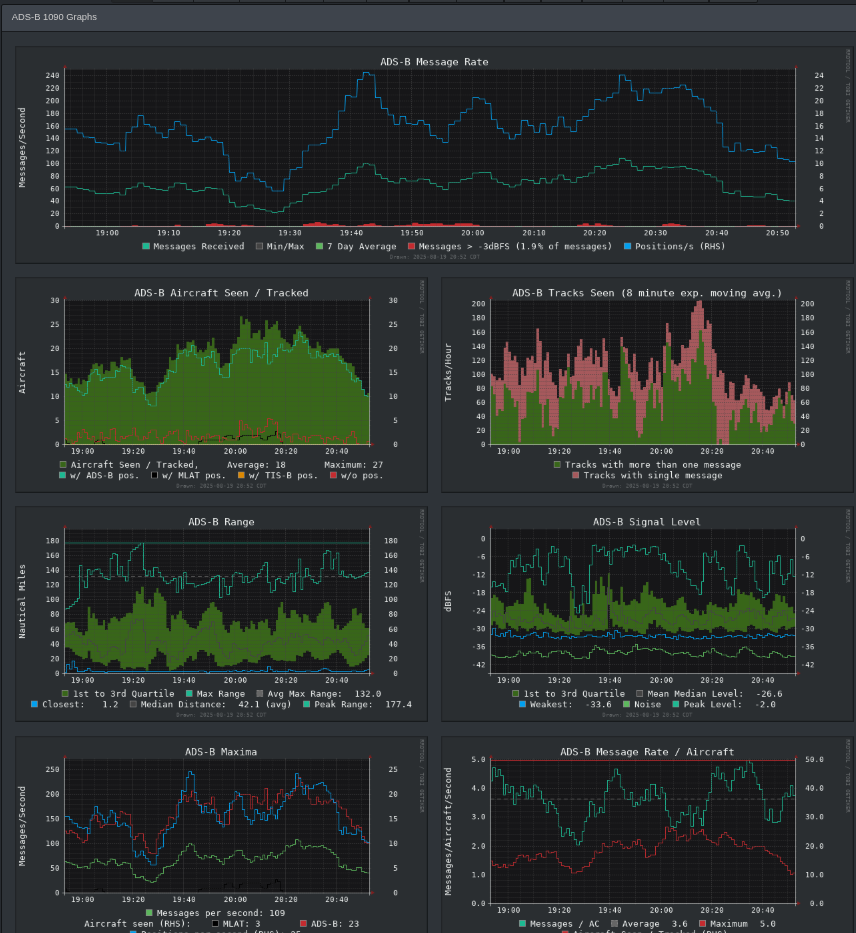
So far, results are solid. I routinely see 180 nautical miles or more in range, with healthy message rates and stable MLAT participation. There’s a little more performance to be squeezed out with a taller mast, but so far so good.
Other things I considered
- 978 UAT coverage - I’m in Canada, 1090 MHz is our ADS-B implementation, we don’t run any 978 MHz.
- Generic RTL-SDR + External LNA: The FlightStick is just easy, keeps the parts count low and the enclosure more simple.
- Different software images (e.g. piecemeal PiOS + dump1090): Perfectly viable, but the ADS-B Feeder Image is a clean, containerized baseline with all the feeders I wanted. My homelab is starting to hit the point where maintenance is becoming a burden, so keeping maintenance low is now a priority.
Cost Snapshot
- Raspberry Pi 4, 2GB: $63 + tax, shipping
- MicroSD Card: $12 + tax, shipping
- AirNav Dongle and Antenna Bundle: $101 + tax, shipping
- Project Box: $37 + tax, shipping
- PoE Splitter: $14 + tax, shipping
- SMA Extension Cable: $6 + tax, shipping
- 50ft Outdoor Cat6: $19 + tax, shipping
- Antenna Mast: $28 + tax, shipping
Grand Total: $179